Filter Emails Easily in Outlook


Need a better way to manage emails in Outlook? You could start with the filter function.
It's a useful feature that allows for automated email management. Let's find out more and discuss a couple examples of how to filter emails in Outlook.
How to Filter Emails in Outlook
There can be any number of scenarios for using the filter feature, but most of them can be covered by two methods:
- Using the search bar. The advanced options allow you to specify the search for specific messages, and then you can perform bulk actions with them if needed.
- Creating a rule. You can set a rule from the Settings menu and use the filter whenever needed.
However, there are two types of Outlook - a web app for the namesake email service and a desktop email client. The two tools have different interfaces, and it's easy to expect different filtering functionality, at least slightly. So, which app are you using?
Outlook: Desktop or Webmail?

When you hear "Outlook," what do you think of first? Is it the desktop app that holds up the Microsoft Office branding or the service that provides @outlook.com accounts?
Before we dive into our step-by-step guide on how to filter emails in Outlook, let's distinguish between the two because both platforms take a slightly different approach to filtering emails.
Webmail: Outlook on the Web
Outlook on the web is the webmail interface for the Microsoft email service that provides @outlook.com and @hotmail.com domains for your addresses. It's also part of Microsoft 365, which allows you to use all the Office tools online, including OneDrive, Word, and Skype.
You could say it's a mirror image of Google Workspace.
With the webmail system, all your emails, contacts, calendars, and other email-related information are on online servers. You can access them from any device or browser and from the Outlook mobile app.
MS Outlook for Desktop

The Microsoft Outlook desktop email client (or MS Outlook) is a computer program that enables access from your computer to any account, regardless of its provider.
With the Outlook email client, you can use typical webmail features, such as your address books, email folders, and chats. You can also enjoy other advantages, like more advanced encryption and add-ins.
Before we get to instructions for that, let's examine how filtering messages can help improve email management.
Why Do You Need the Filtering Feature in Outlook or Any Other Email Tool?

You could get by without turning your "filter" on, but taking advantage of this feature can undoubtedly improve both your personal and business email productivity.
Here are some of the top reasons you may benefit from the filter feature:
- Search for specific messages. If you frequently search for messages from a specific sender (say, your boss) or type of email (e.g., travel plans), using the filter option can separate these emails from the rest.
- Save searches. If any searches become a regular activity, you can save them and get back to them at any time.
- Forward emails to folders. You can create a filter rule to recognize specific emails as soon as they come in and send them into a folder. It's a handy feature for keeping track of important correspondence.
- Create a unified folder for the email client. Outlook for desktop doesn't have a unified inbox, but you can set unified inbox in outlook with a filter rule.
- Filtering out the inbox. No email user is a stranger to receiving bulks of often irrelevant messages in their inboxes. Filtering and deleting them at once saves time on decluttering. This helps you in cleaning email inbox to avoid distraction and read important emails.
How to Filter Emails in Outlook on the Web
Let's see how this can be done in the webmail interface and then in the desktop email client.
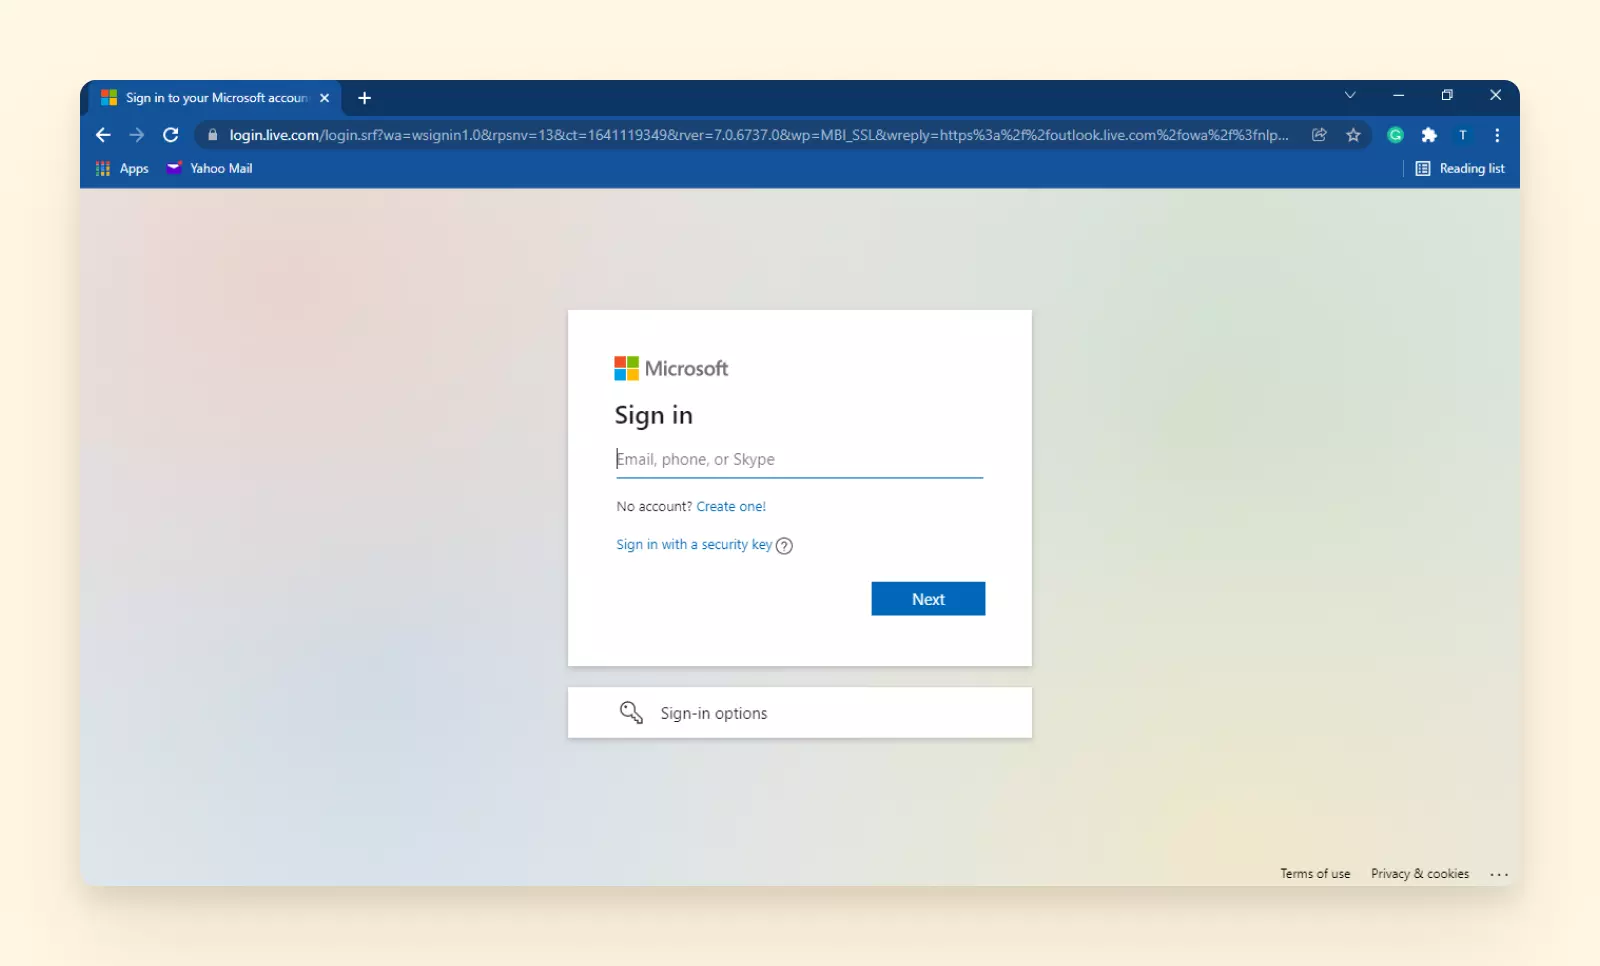
Once you log into your account at outlook.live.com, you'll find all the required tools for filtering at the top of the interface: the search bar for a one-time filter and the Settings menu to save a filter.
Filtering emails with advanced search
You'll find the search bar at the very top of the interface.
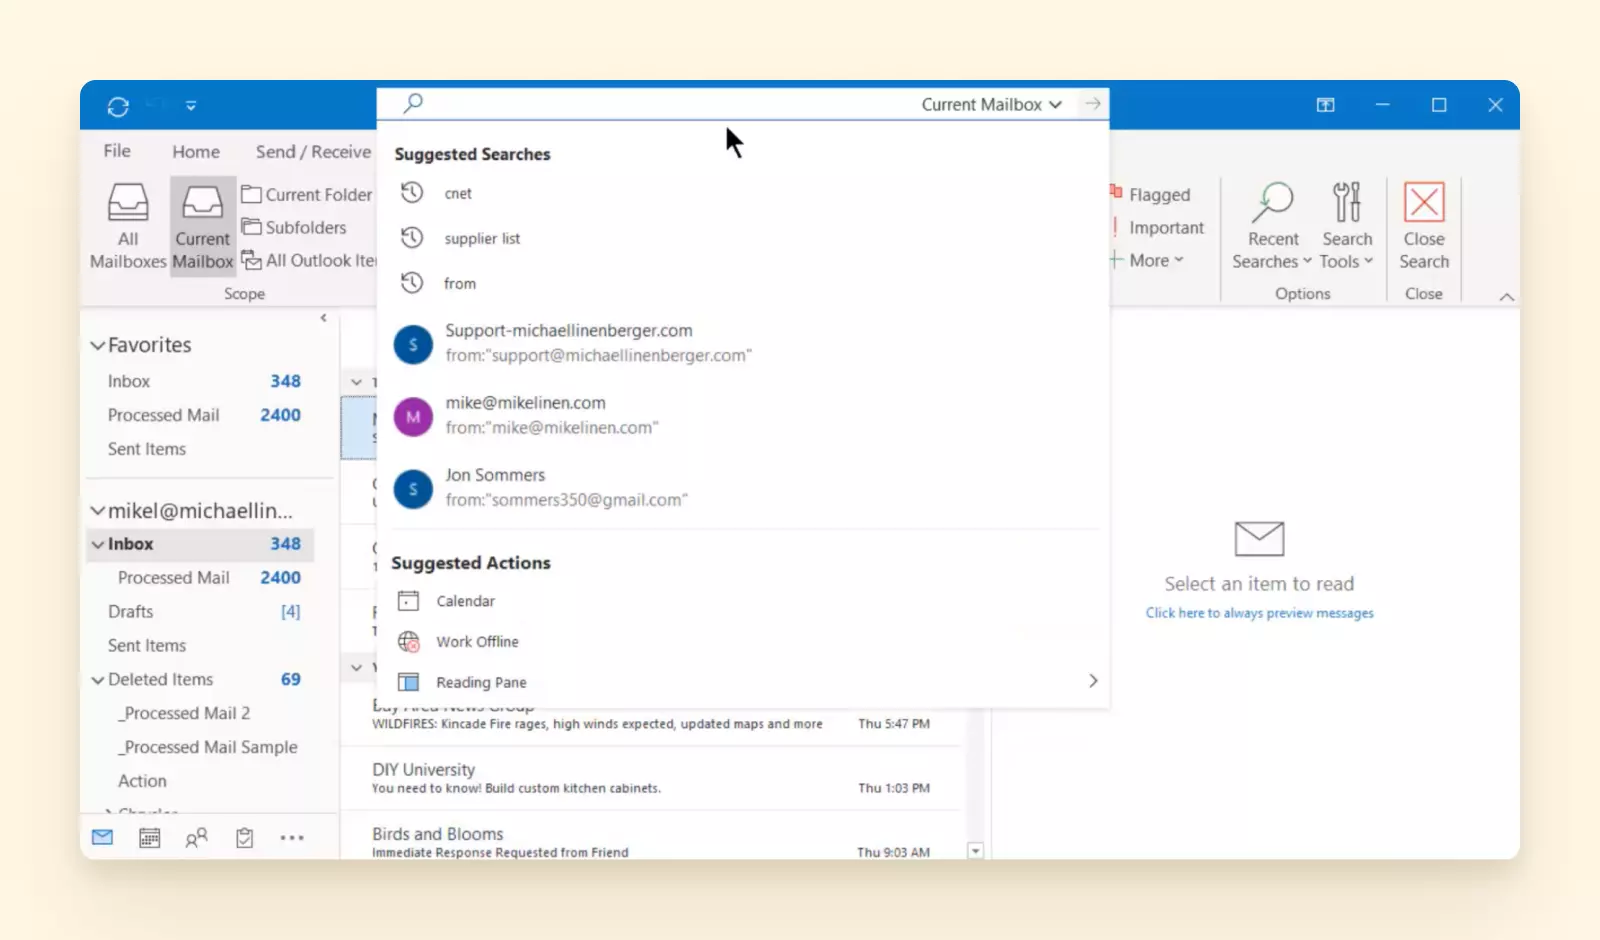
1. Click on the search bar and then on the downwards arrow at the right of the bar that opens the Filters menu.
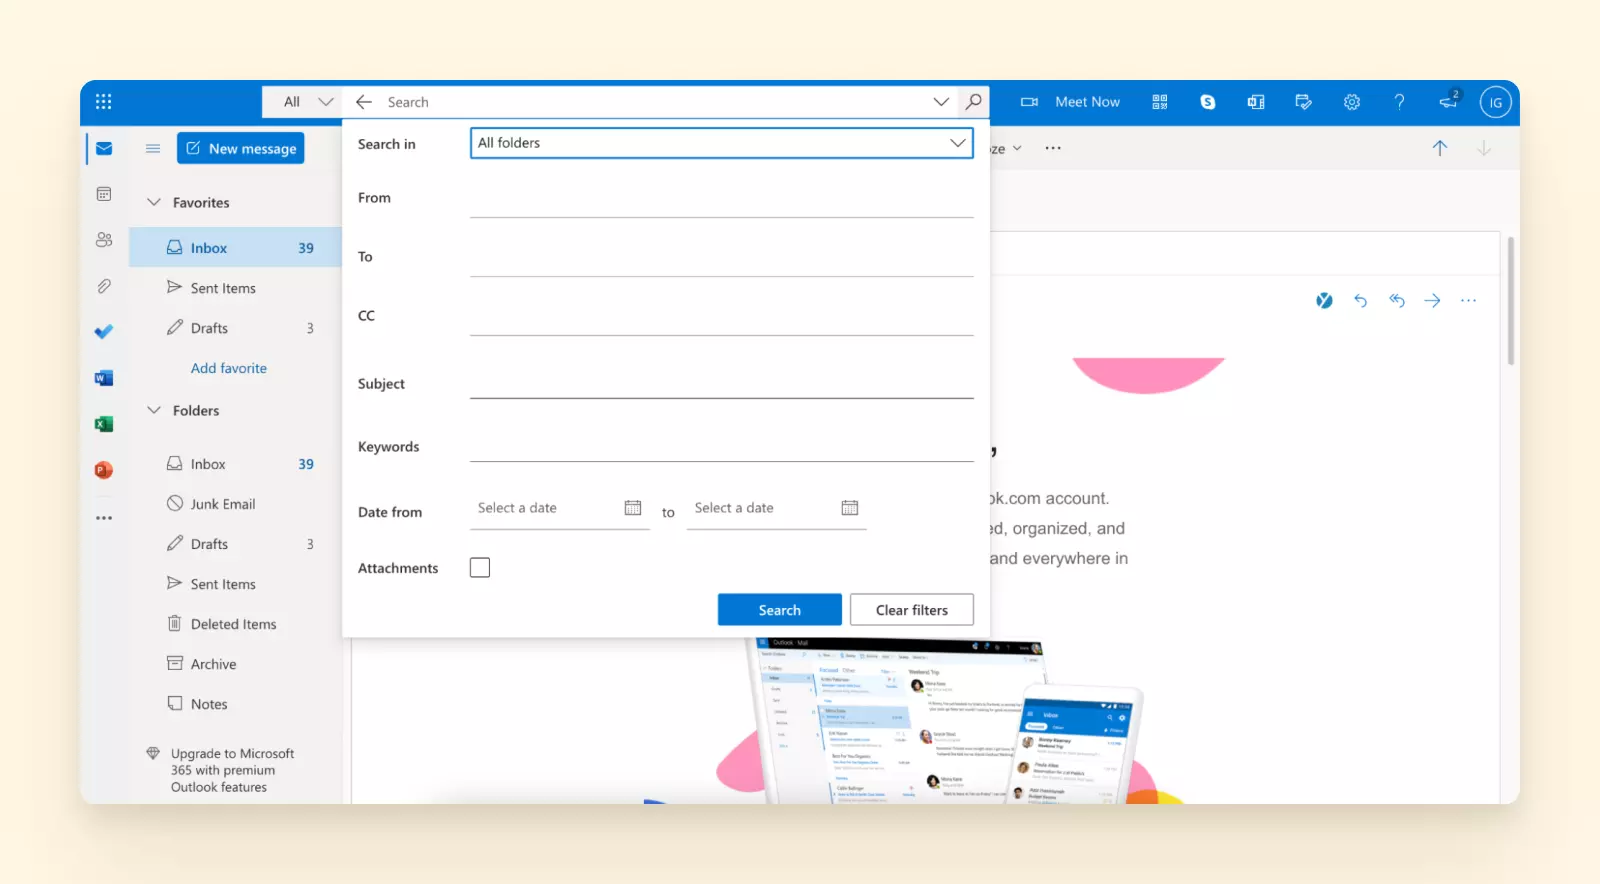
2. In the menu that opens, add information that will specify your filter.
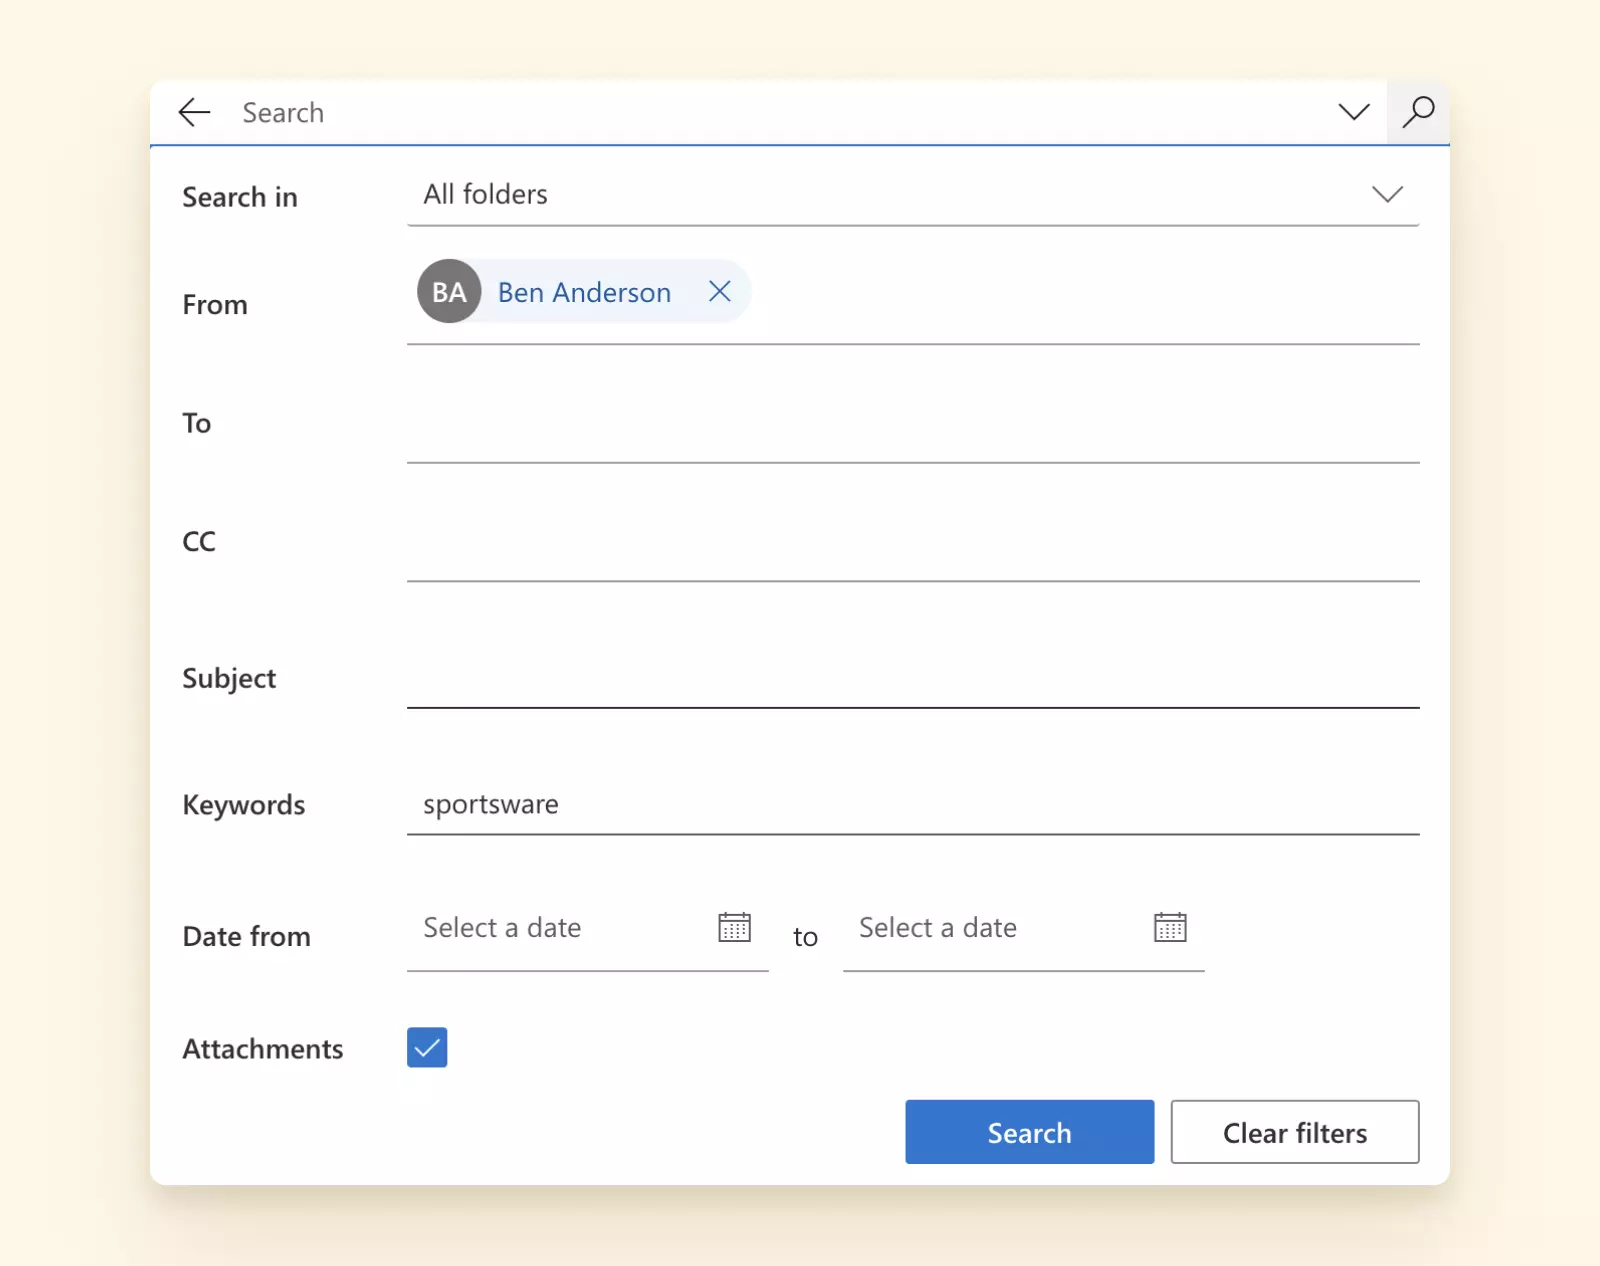
3. Click Search.
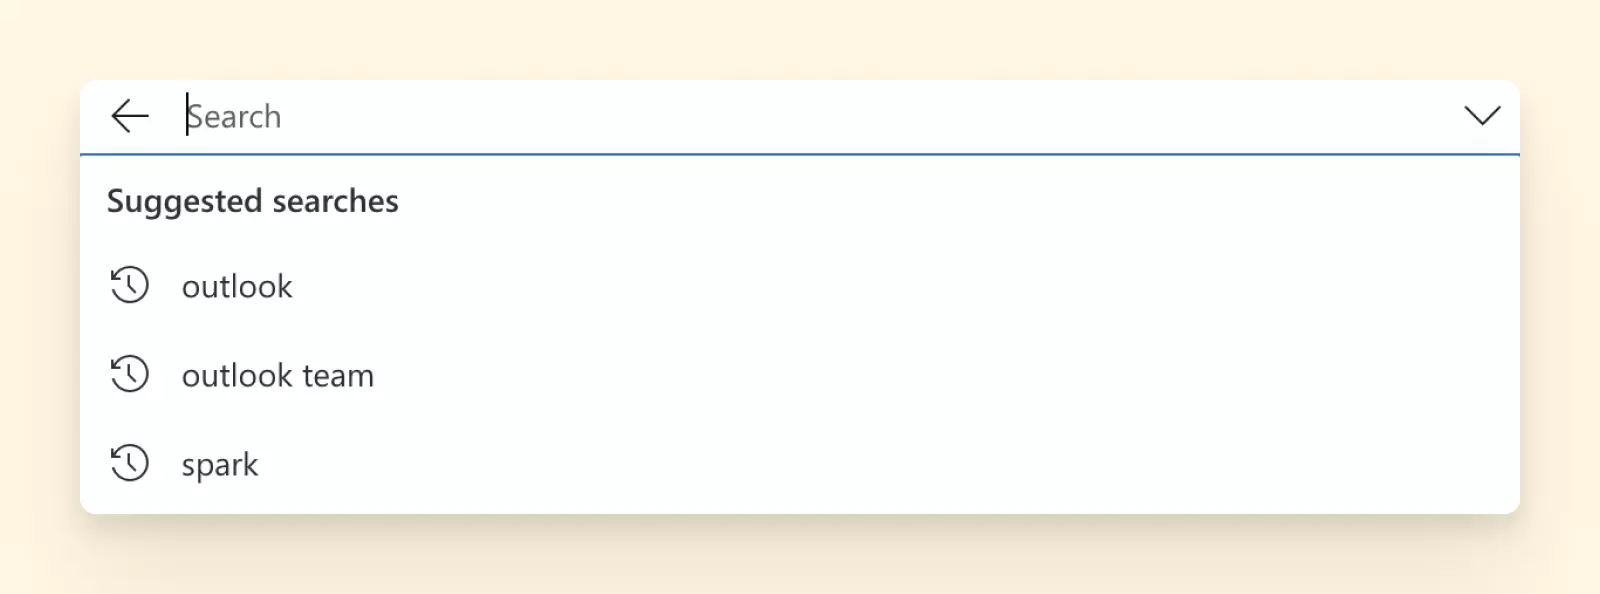
If you click on the search bar once again, you'll see three of your latest searches.
Creating a filter rule
1. Click on Settings - the gear icon in the top right corner of the screen.
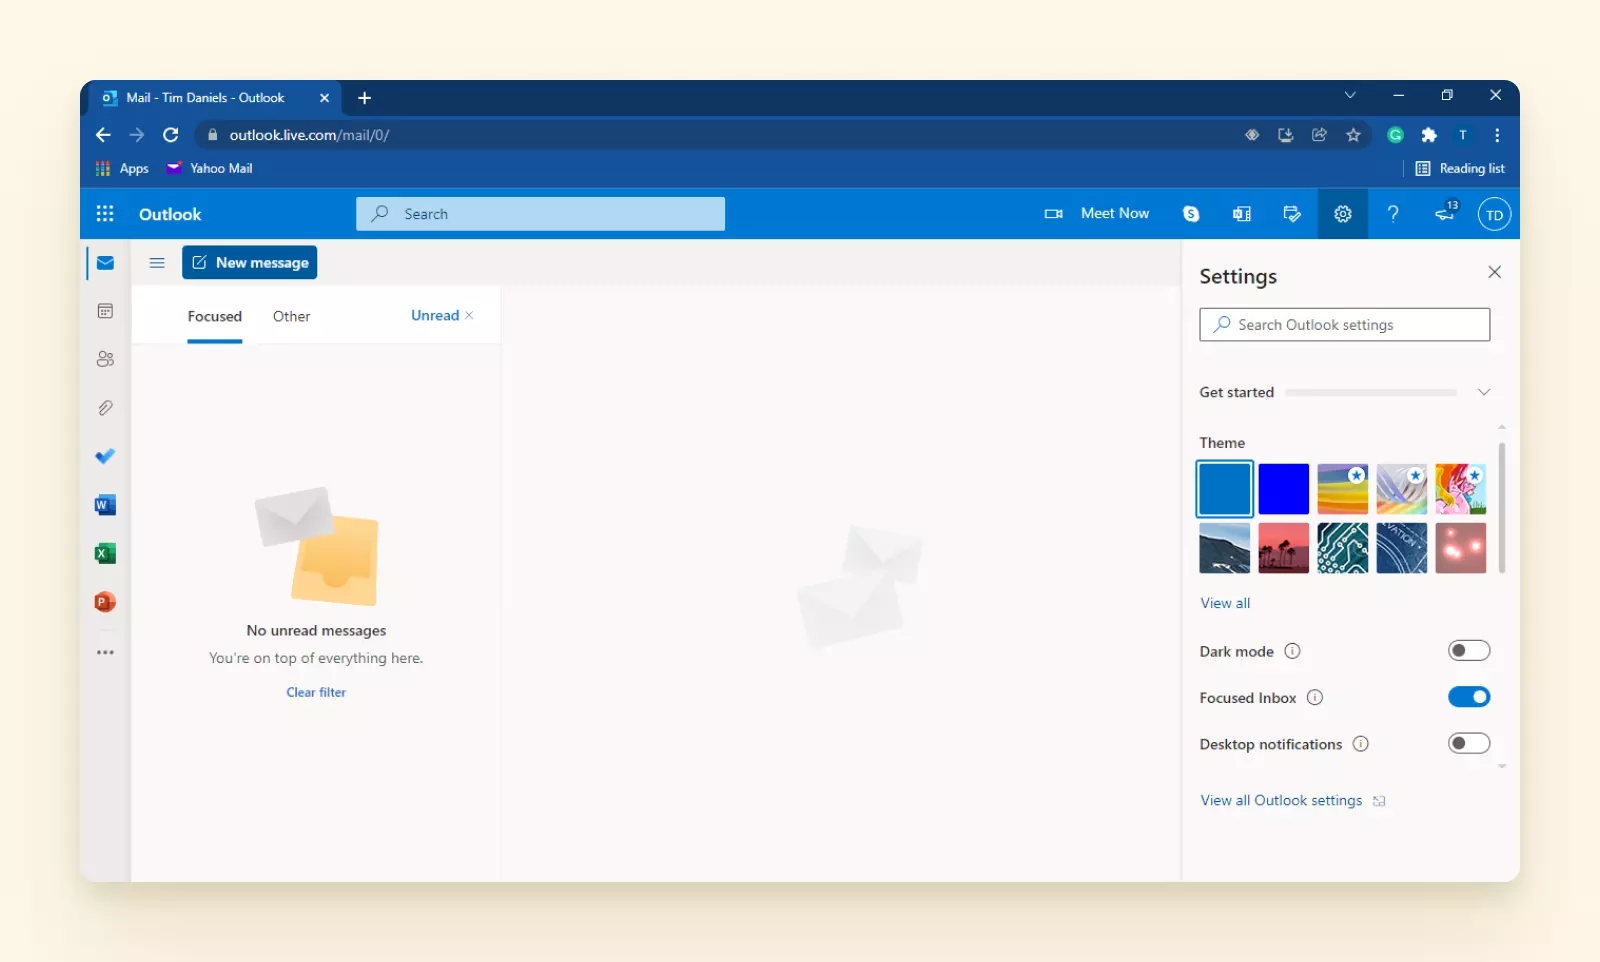
2. Choose View all Outlook Settings. It should open the Settings window.
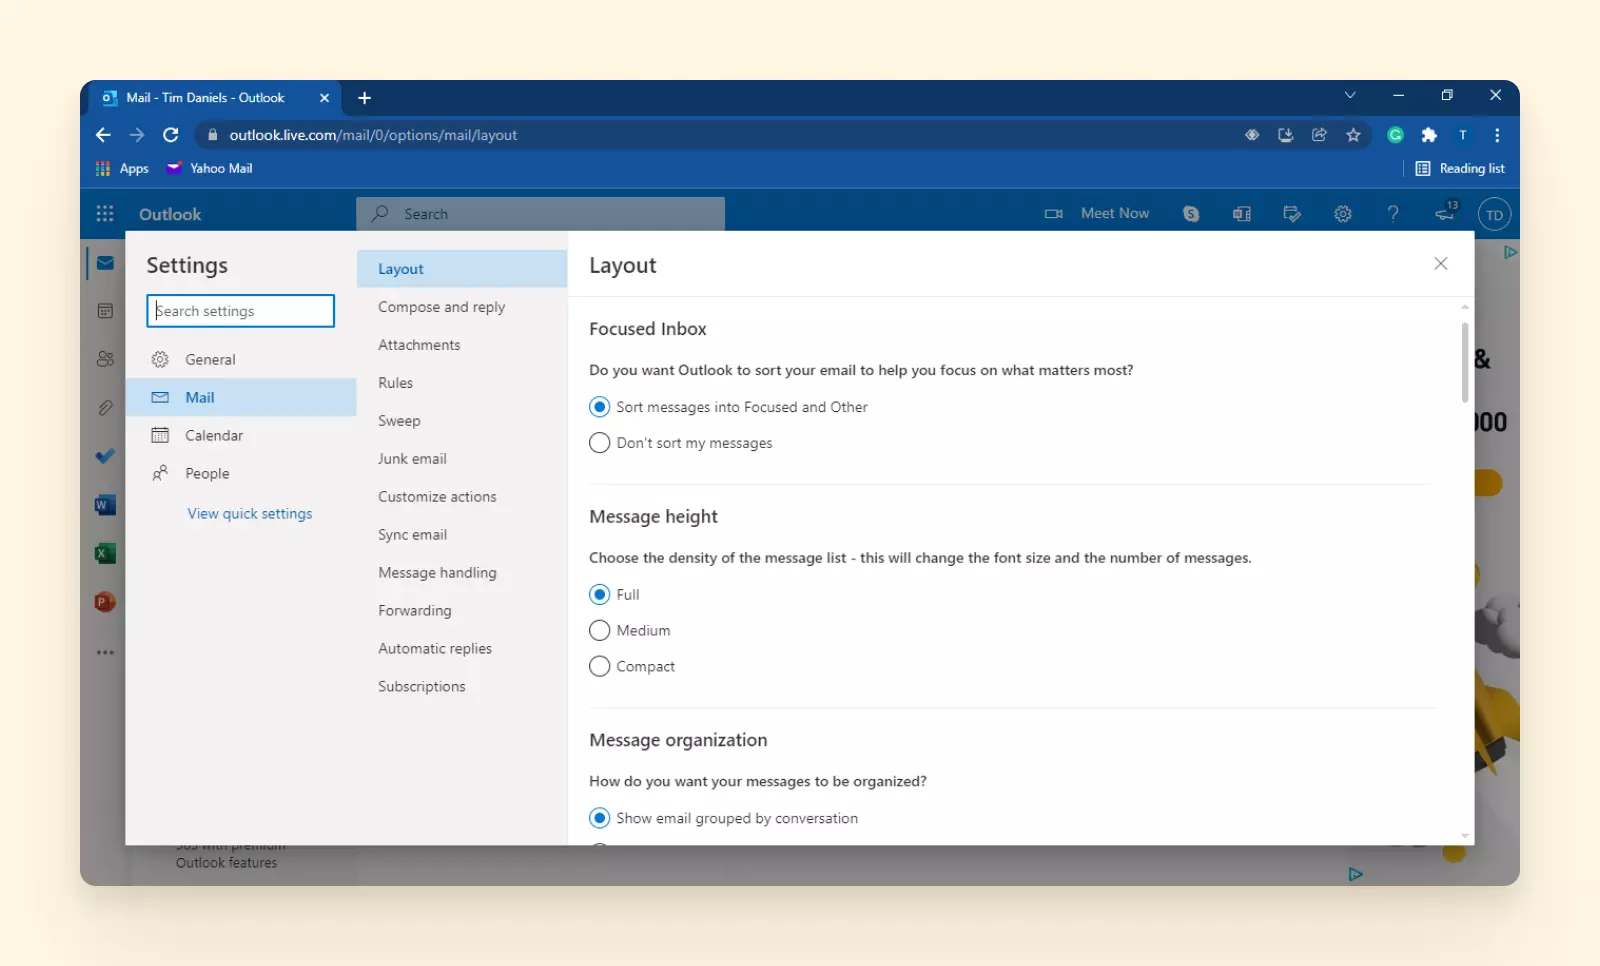
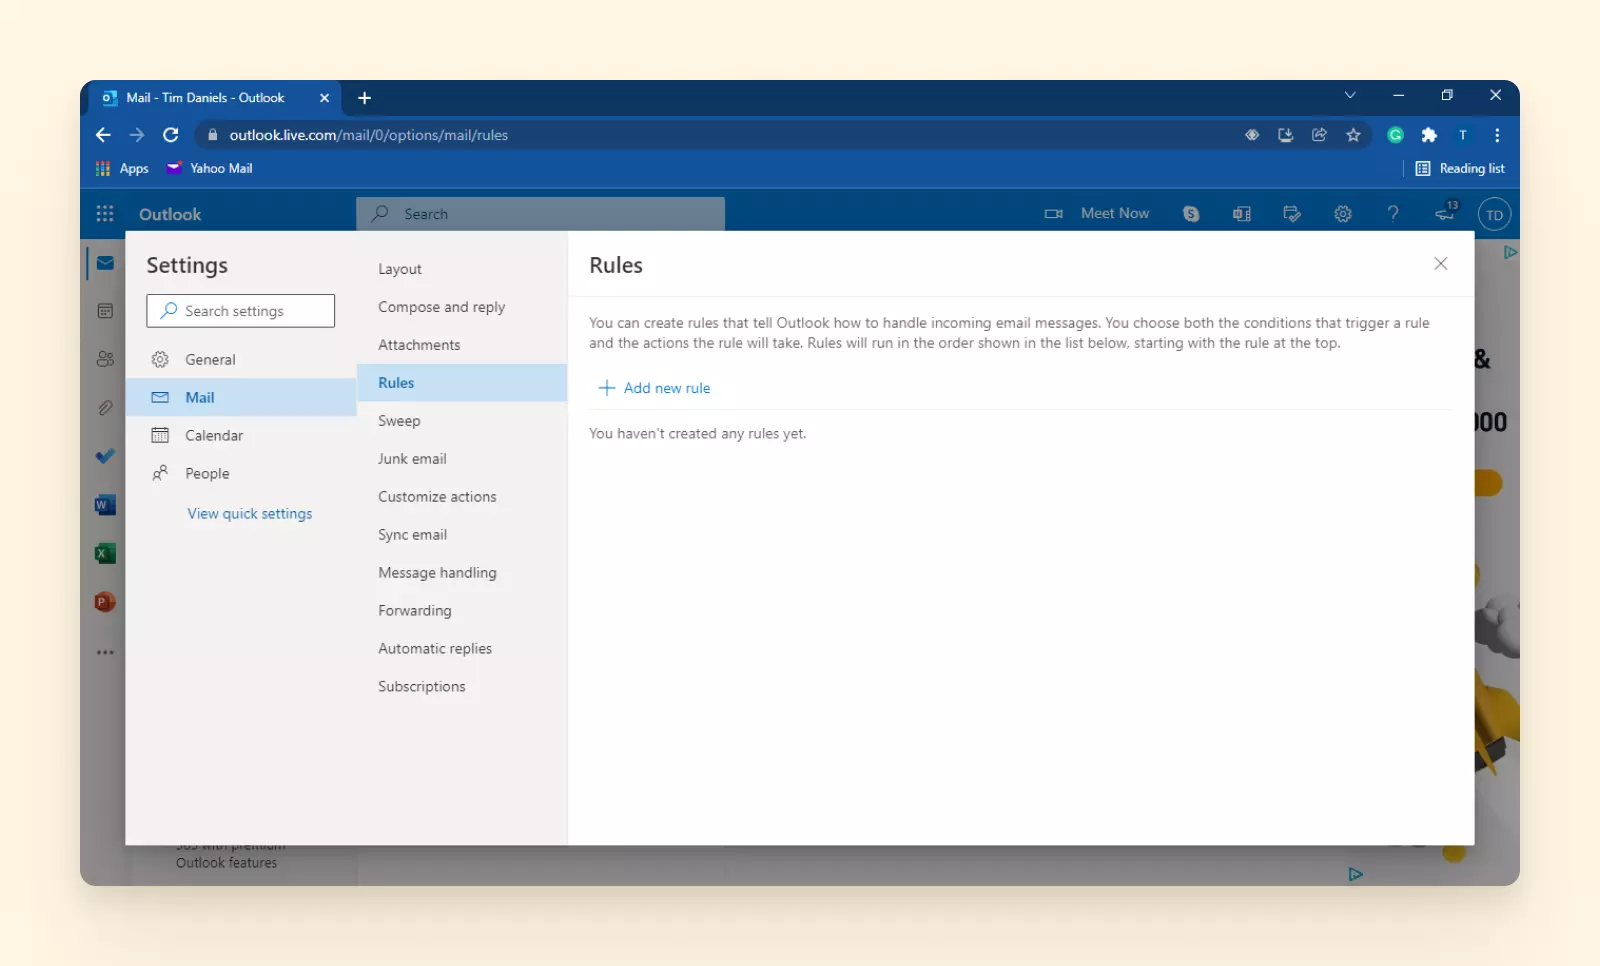
3. Go to Mail > Rules > Add new rule.
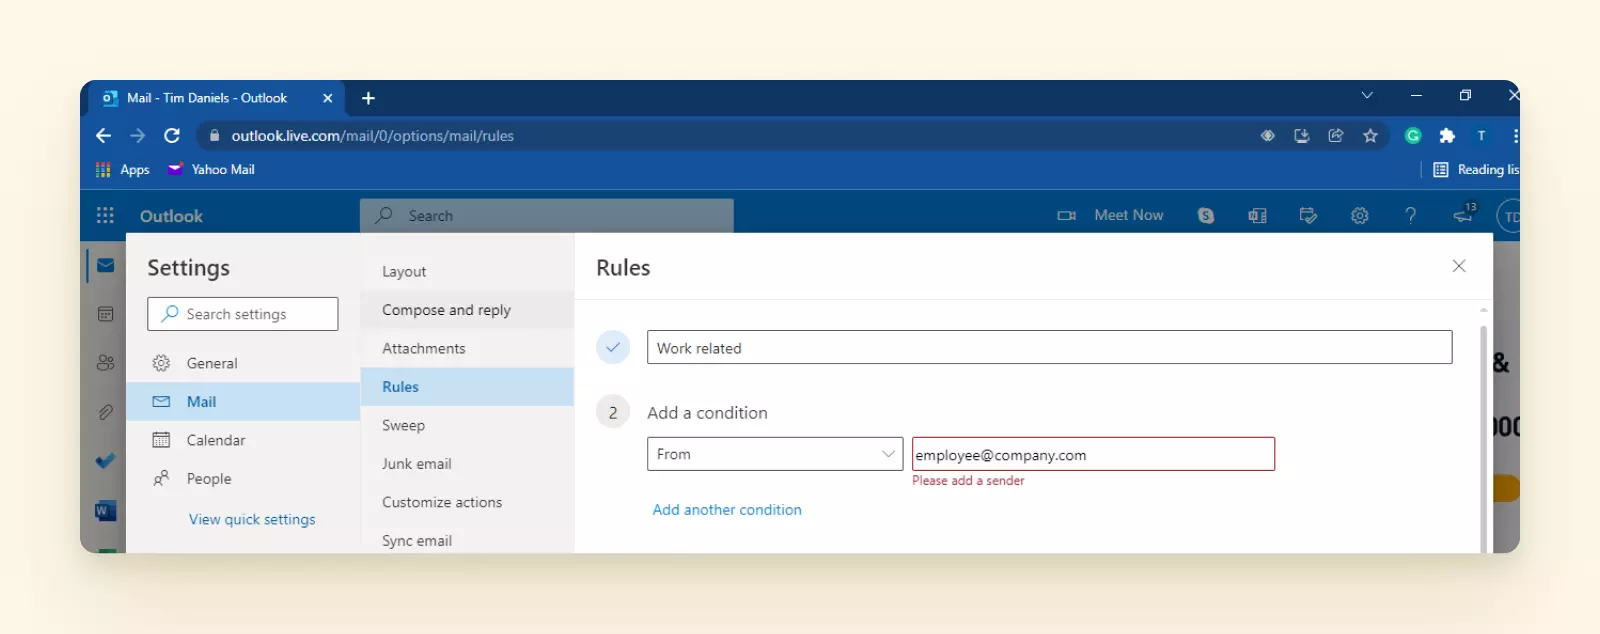
4. Type in a name for your new rule.
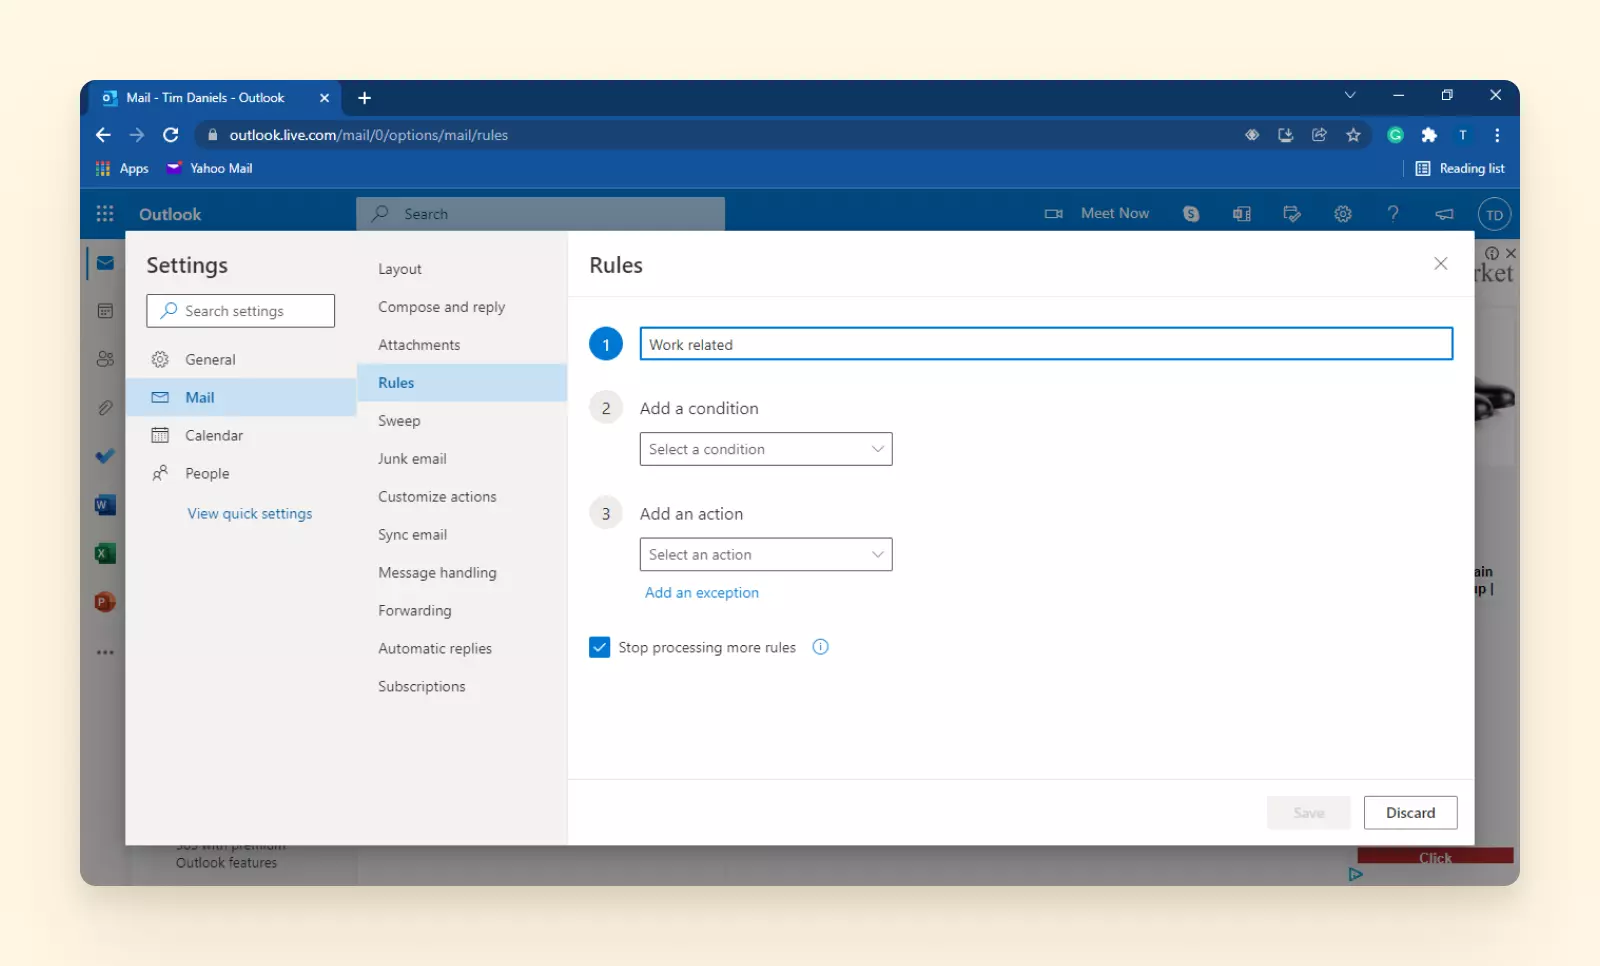
5. Next, click on the dropdown arrow that says Add a Condition, choose any clause from the options, and enter the related information. In this case, we'll select From and type in the sender's email address.
6. Click on the dropdown arrow that says Add an action, select Move to, and choose the target folder.
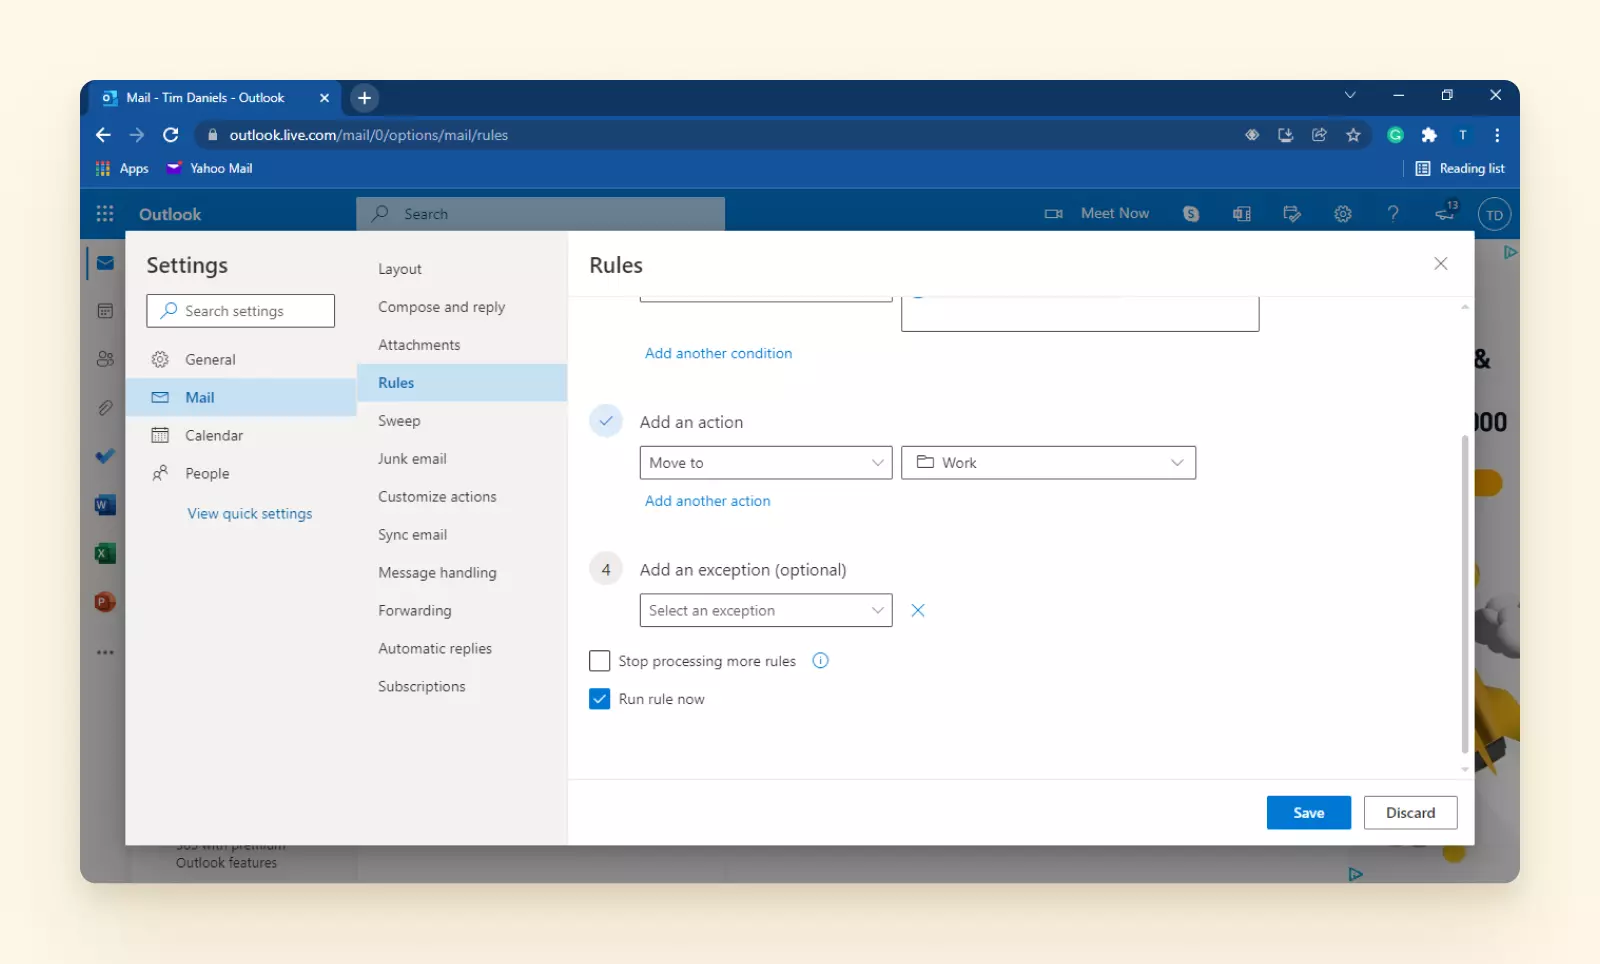
7. Click on Save.
Now, all incoming emails from that email address will automatically divert to the folder you chose. You can also choose to add multiple email addresses to the same rule or create separate rules and folders for different email addresses.
How to Filter Emails in the MS Outlook Email Client
The approach to filtering emails is considerably different if you use the MS Outlook email client. Here's how to do it:
Filter emails with advanced search
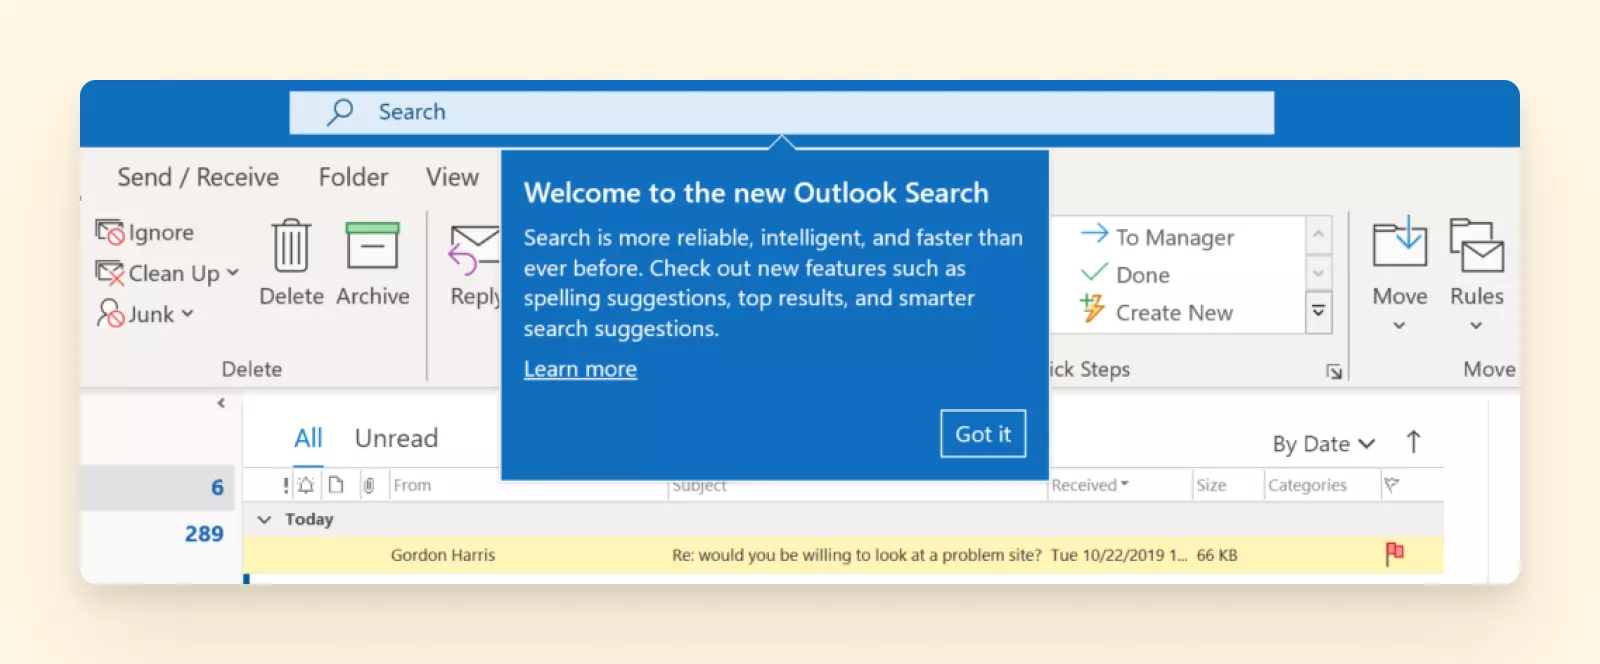
In the more recent versions, you'll find the search bar at the very top of the interface.
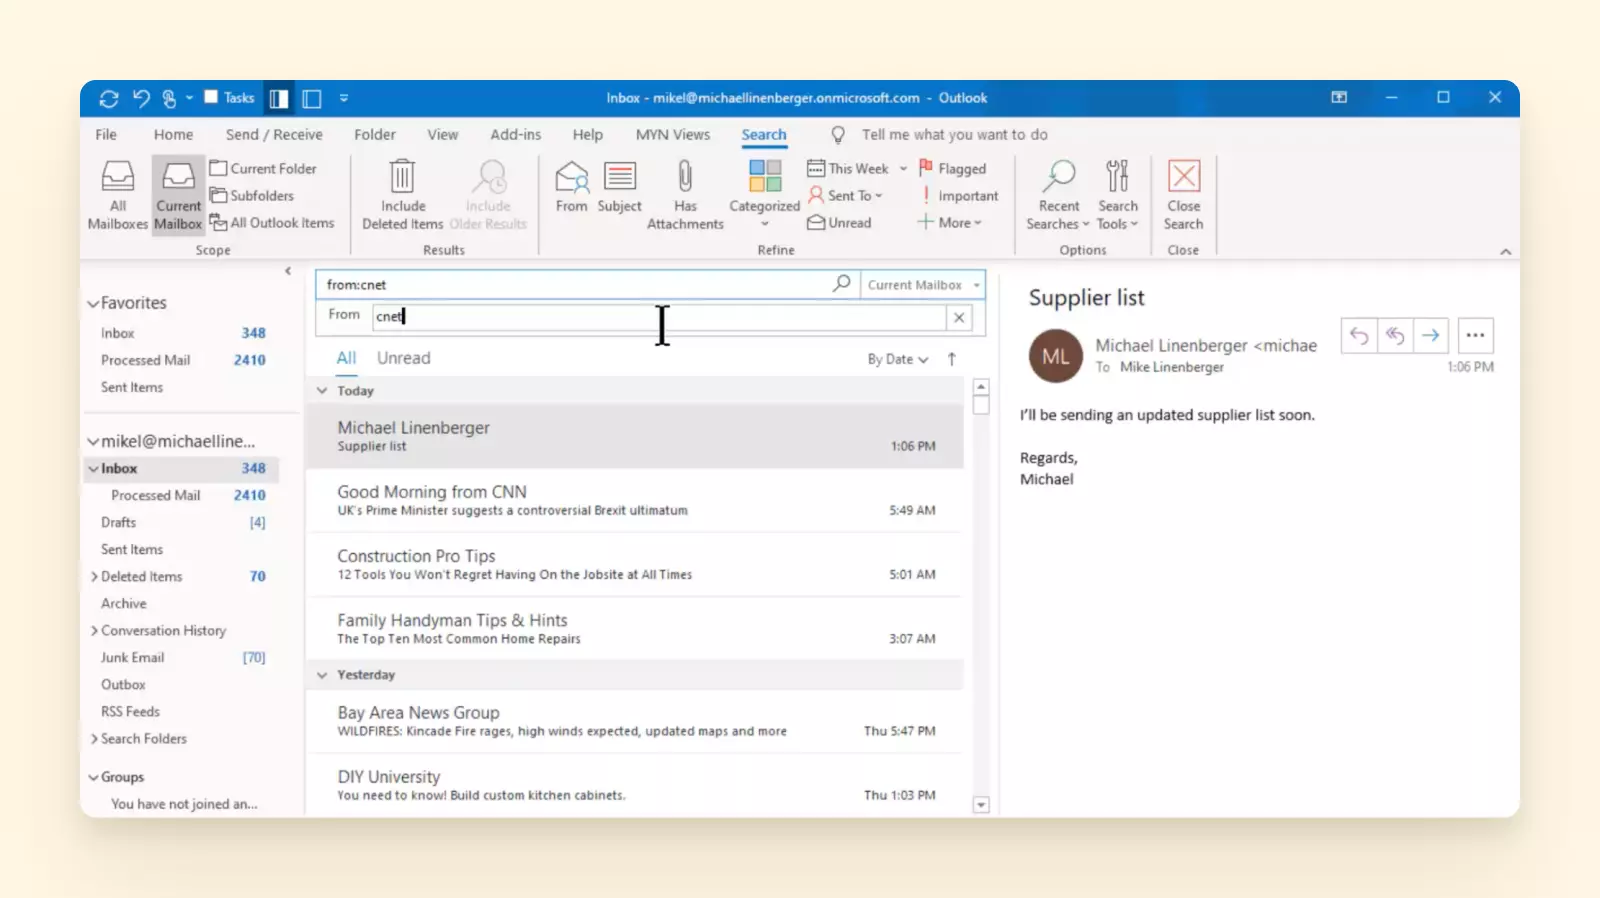
1. Click on Search in the title bar and then on Current Mailbox. This will open the advanced search dialog.
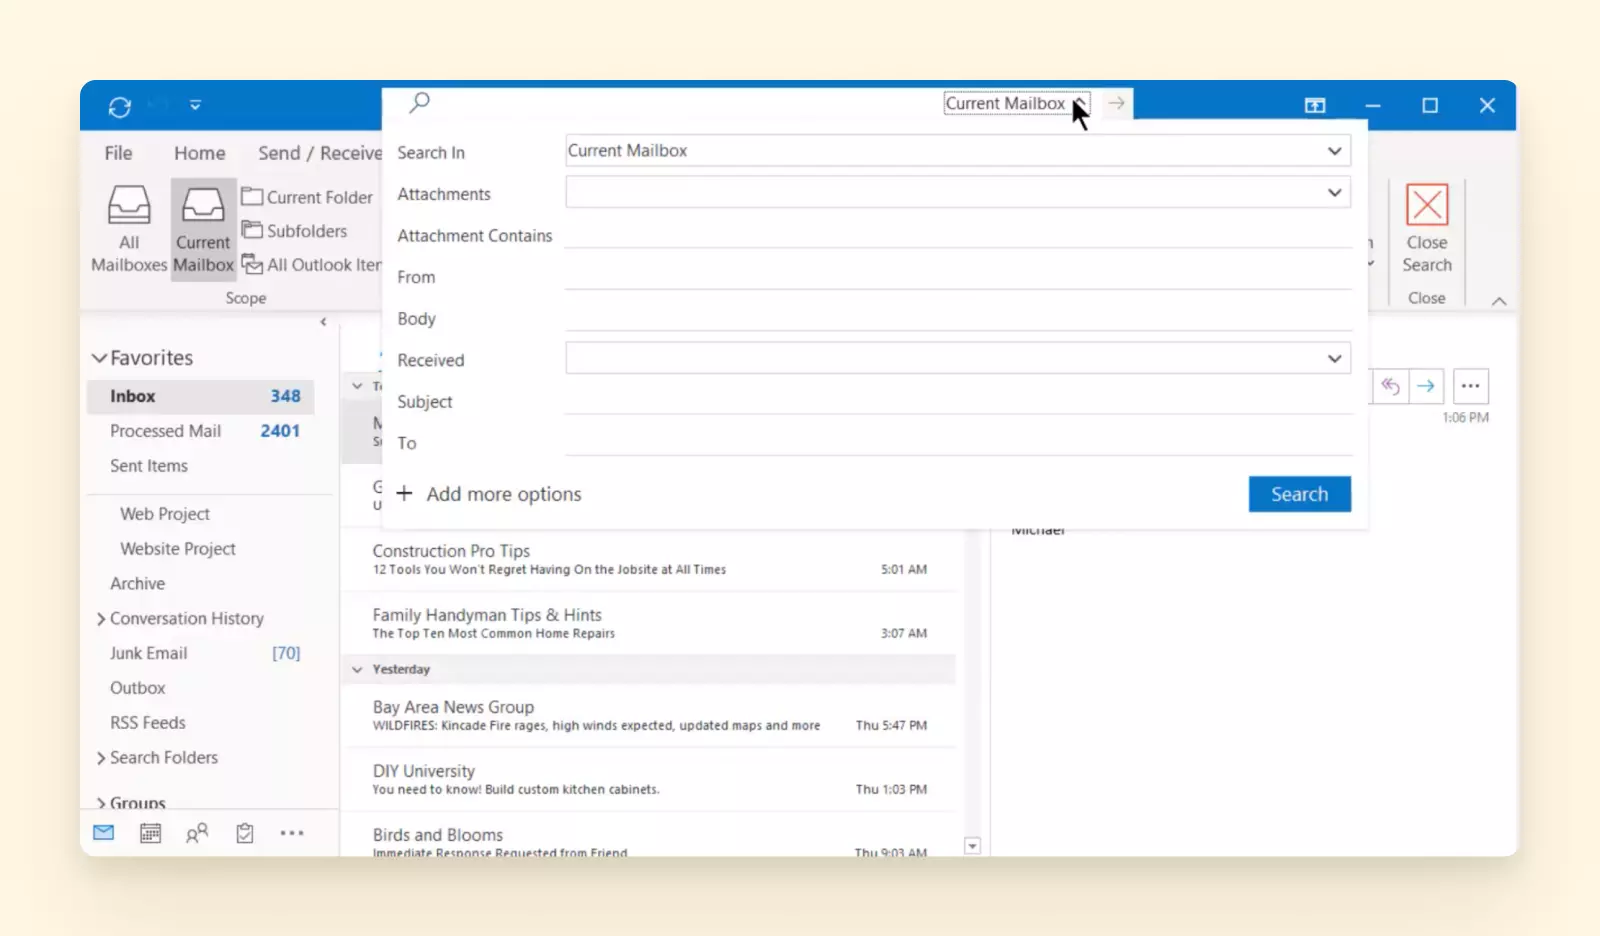
2. Specify your search using the different search conditions and click Search.
3. If you click on the search bar once again, you'll see a few recent searches. Click on one if you want to repeat it.
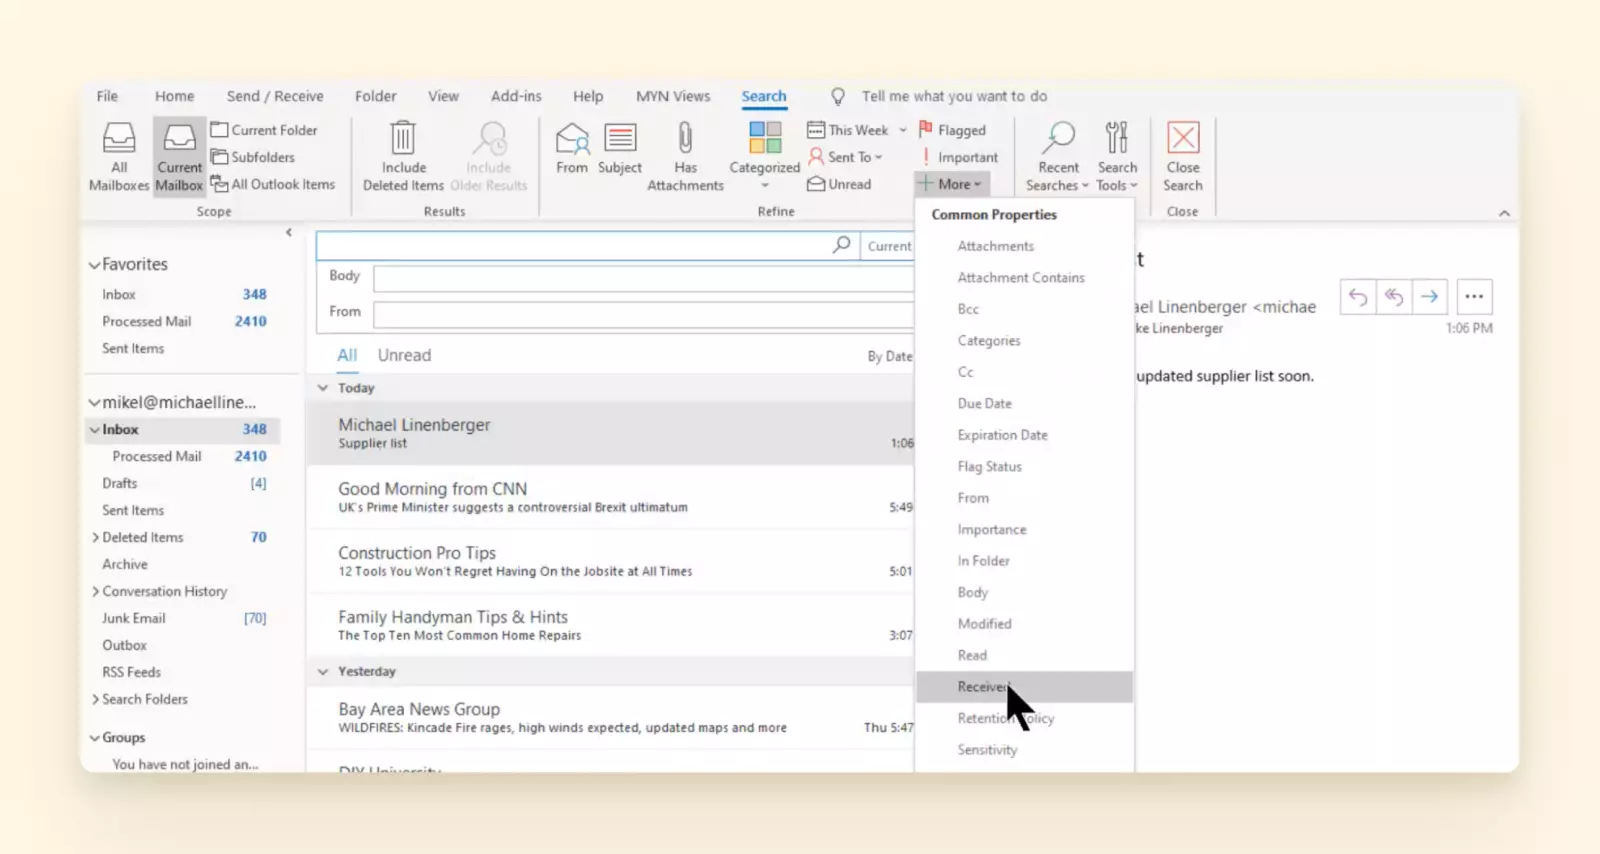
In the older versions, the search bar is right above the inbox.
The major difference is that you'd have to use the More search menu function to add conditions to your search.
Creating a filter rule
There can be numerous cases for rules, so let's check a common one for sending emails from a specific sender to a folder.
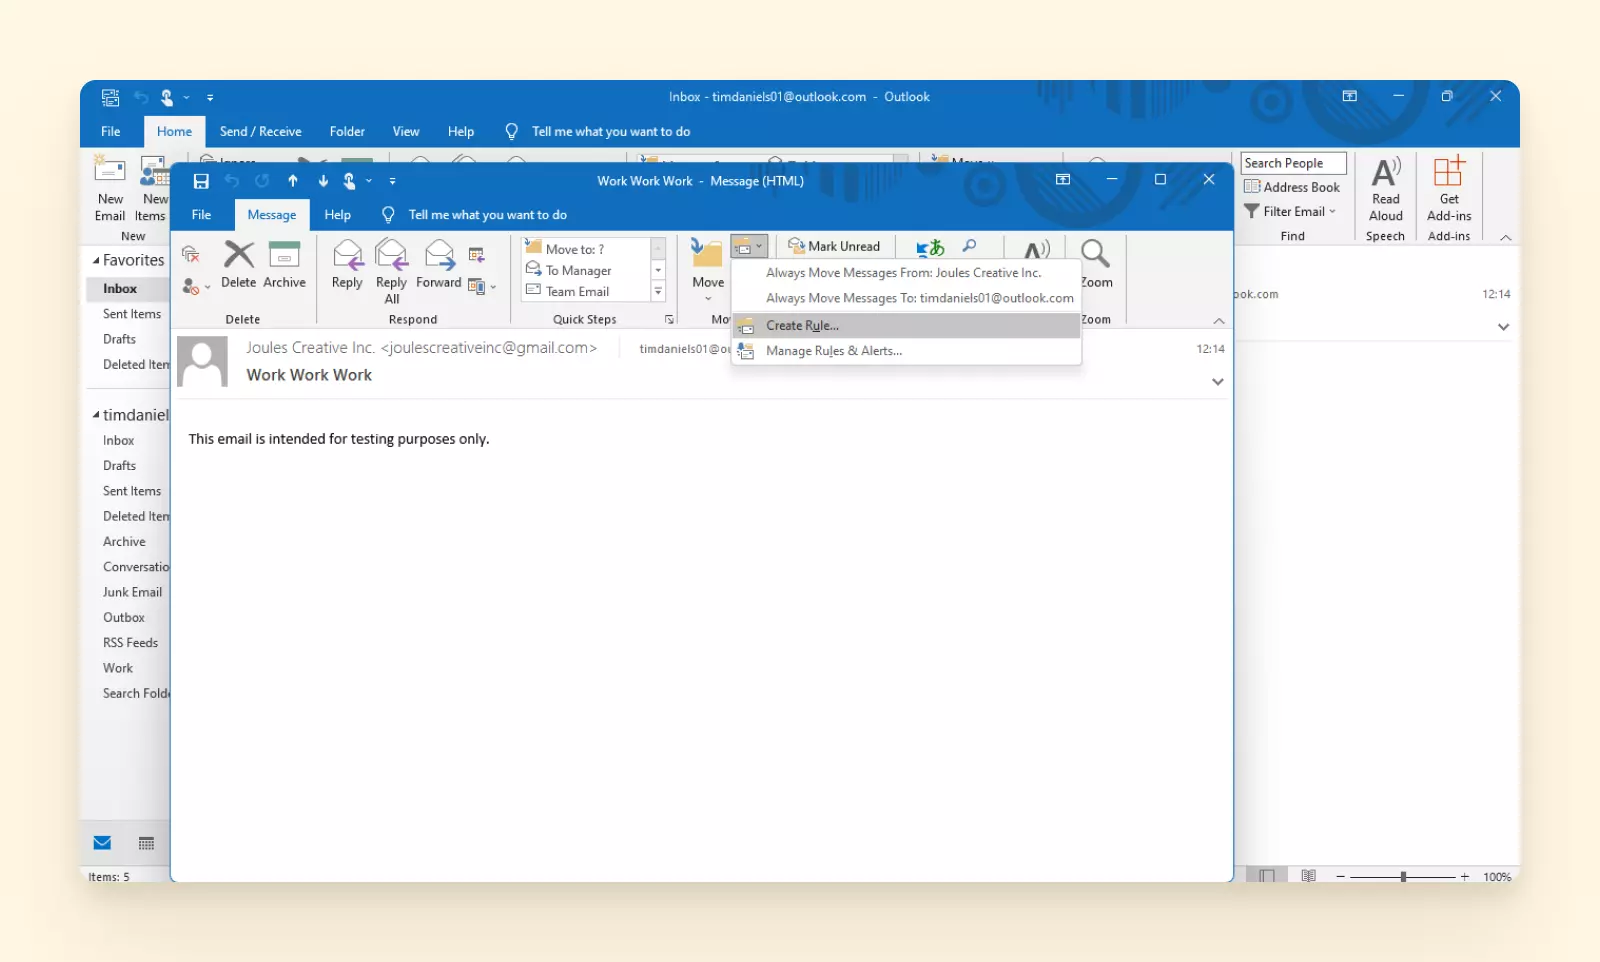
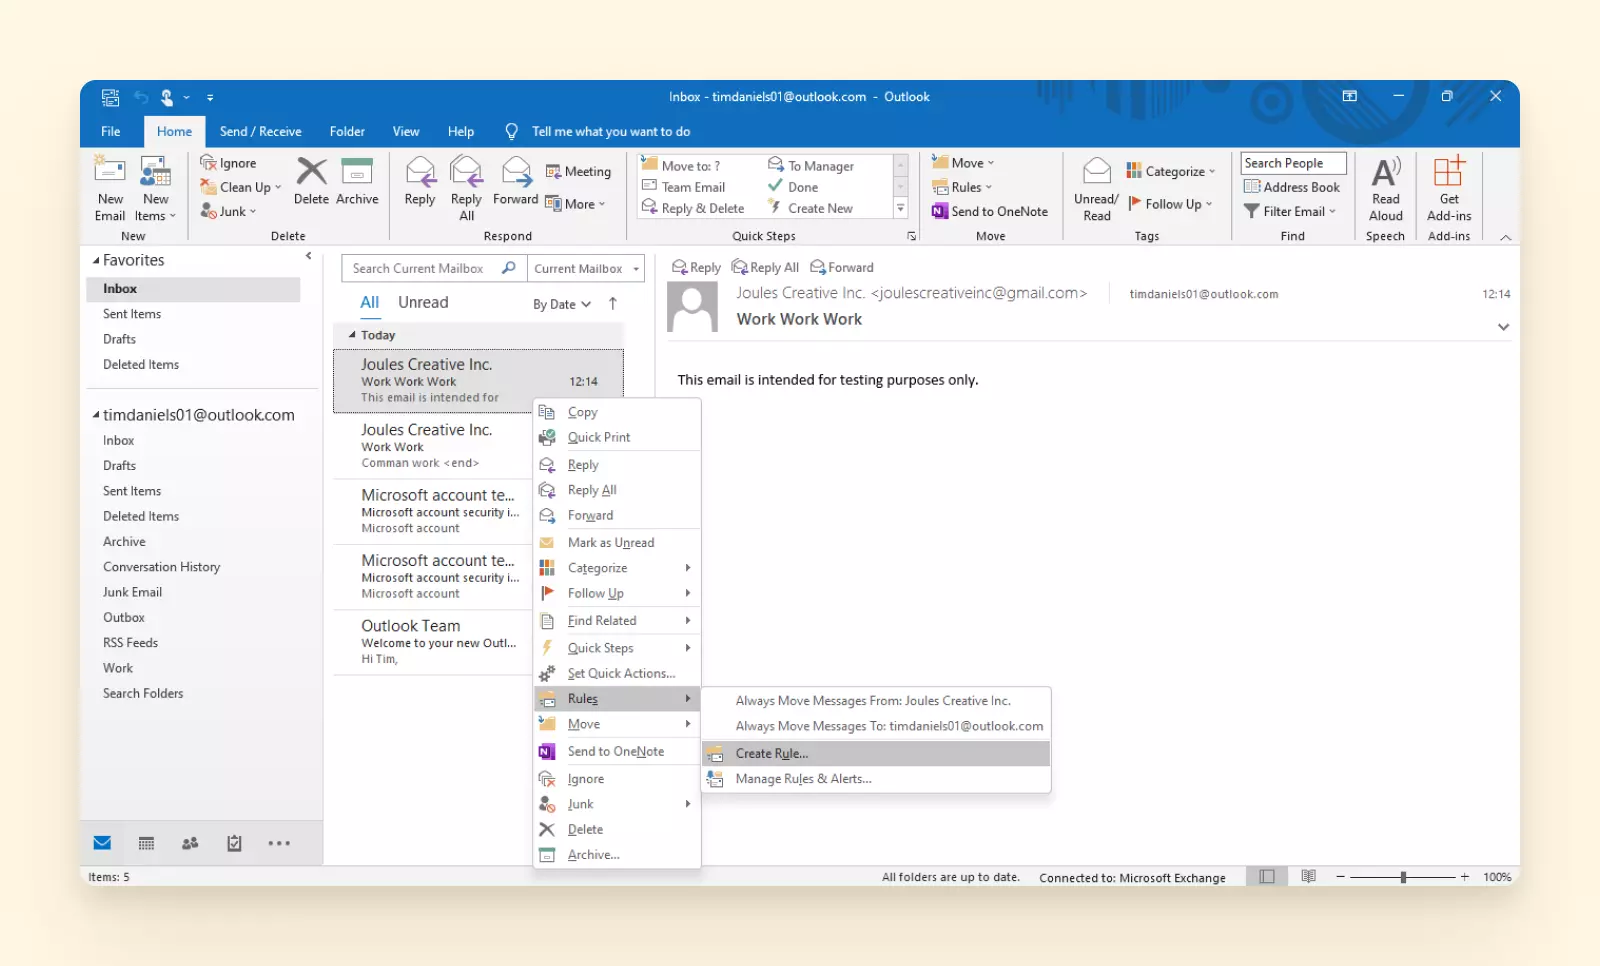
1. Open any email from the sender whose emails you'd like to filter.
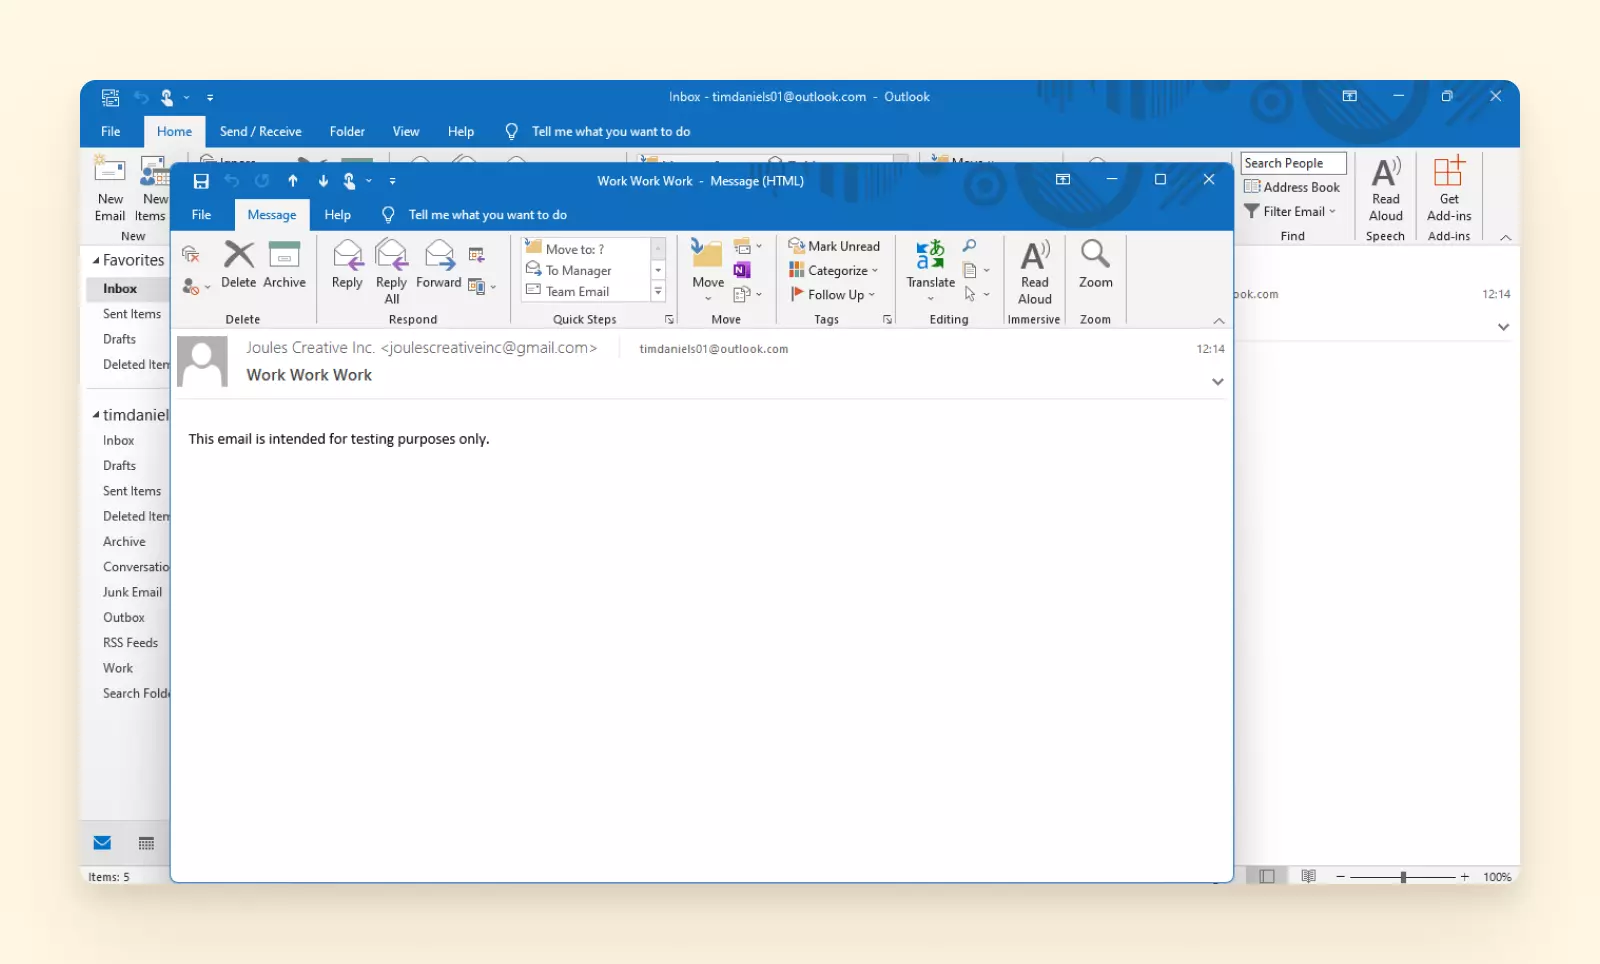
2. Navigate to Message and click on Rules. Then, select Create Rule.
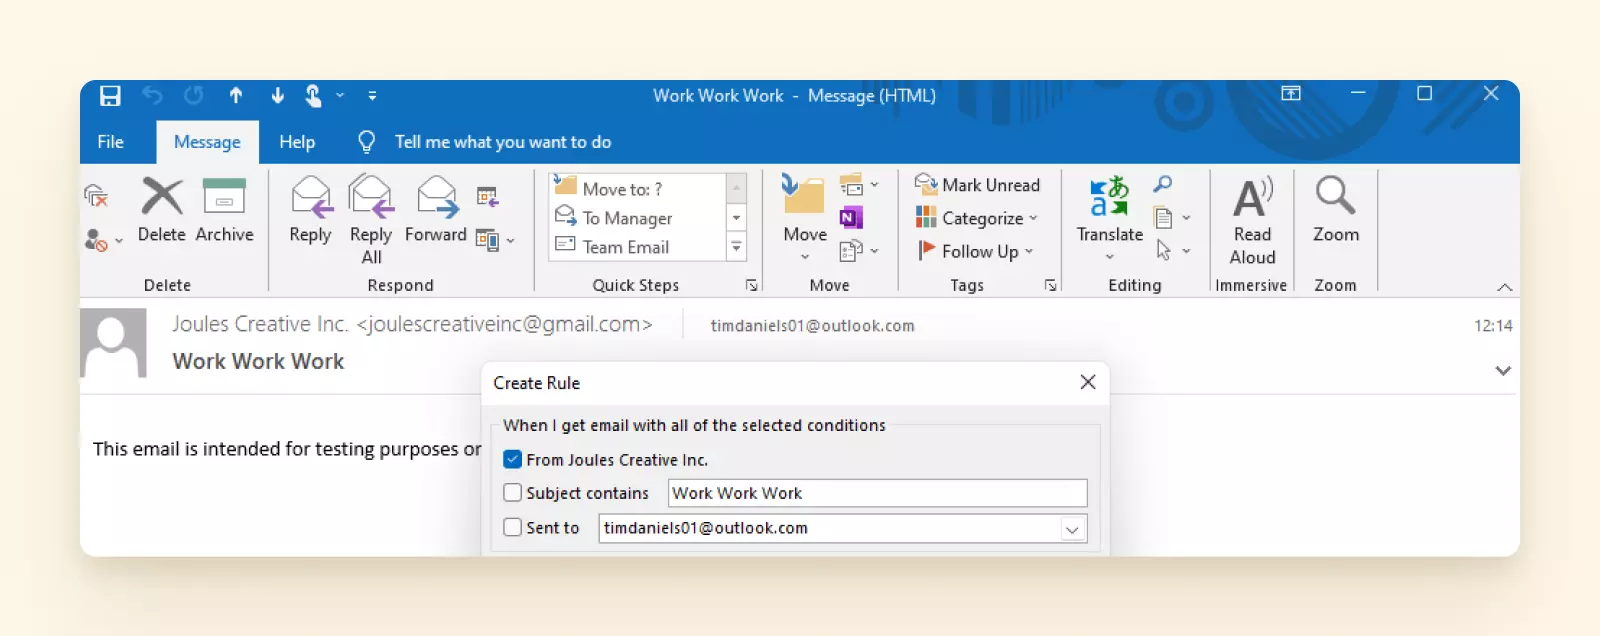
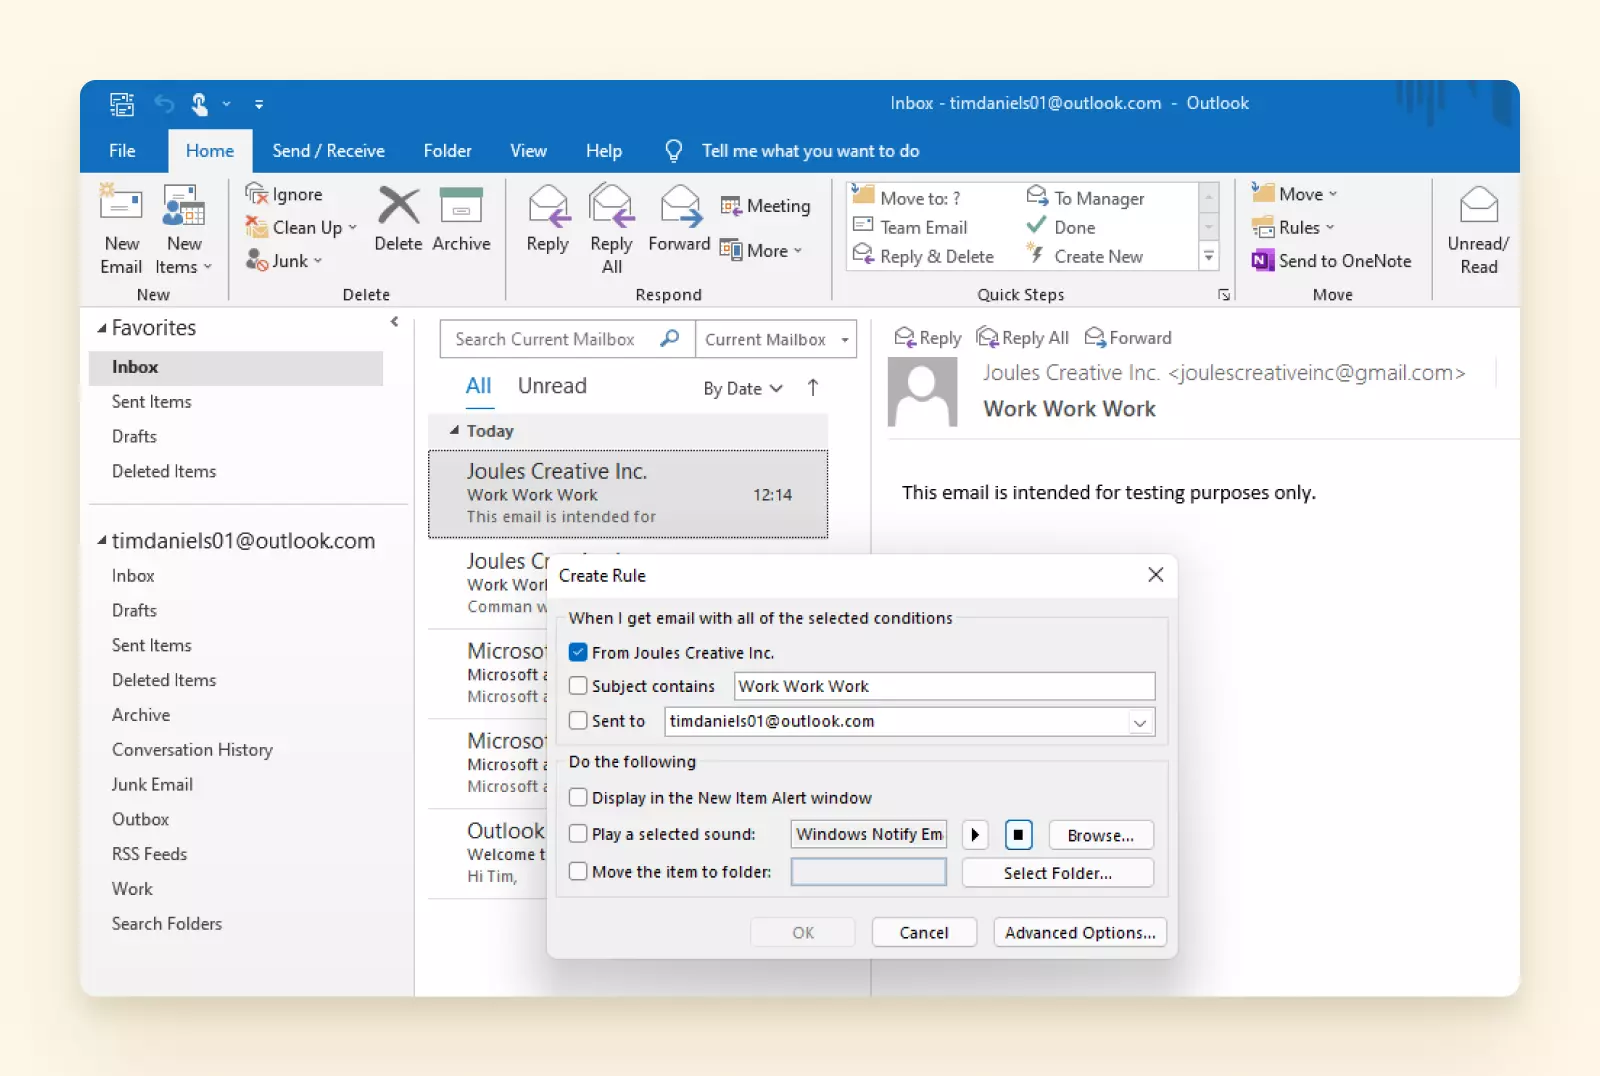
3. You should now see a Create Rule dialog box. In this box, select the From [Sender's name] checkbox.
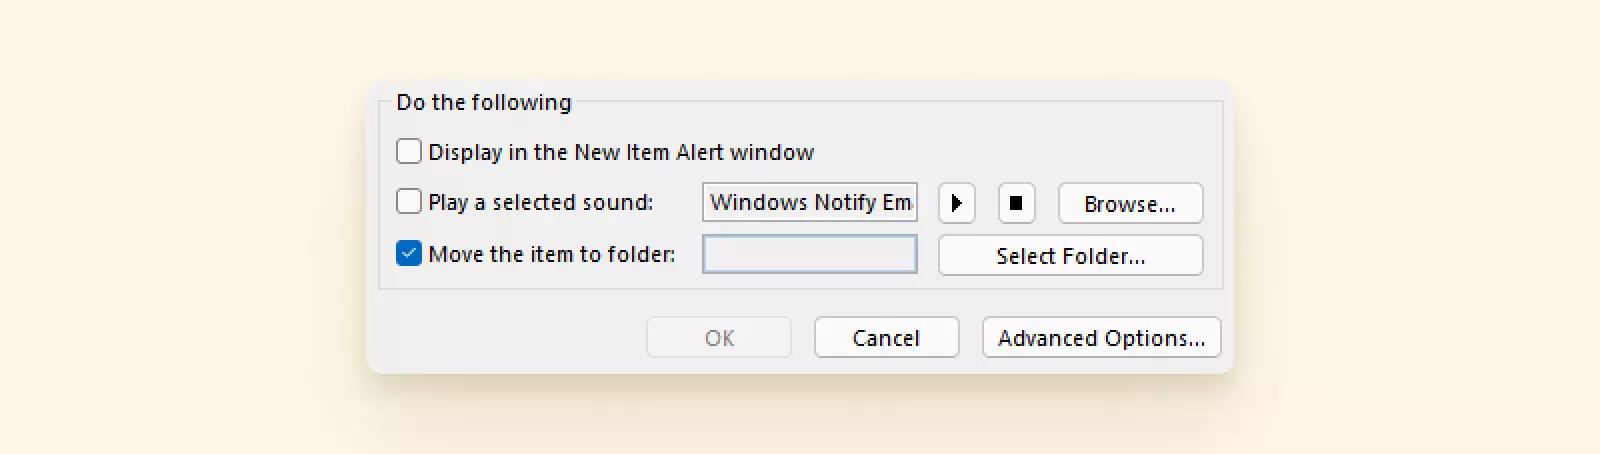
4. Next, in the Do the following Section, click on the Move the item to folder checkbox.
5. Then, look out for the Rules and Alerts dialog box. In this box, select the folder where Outlook will send incoming emails from the sender.
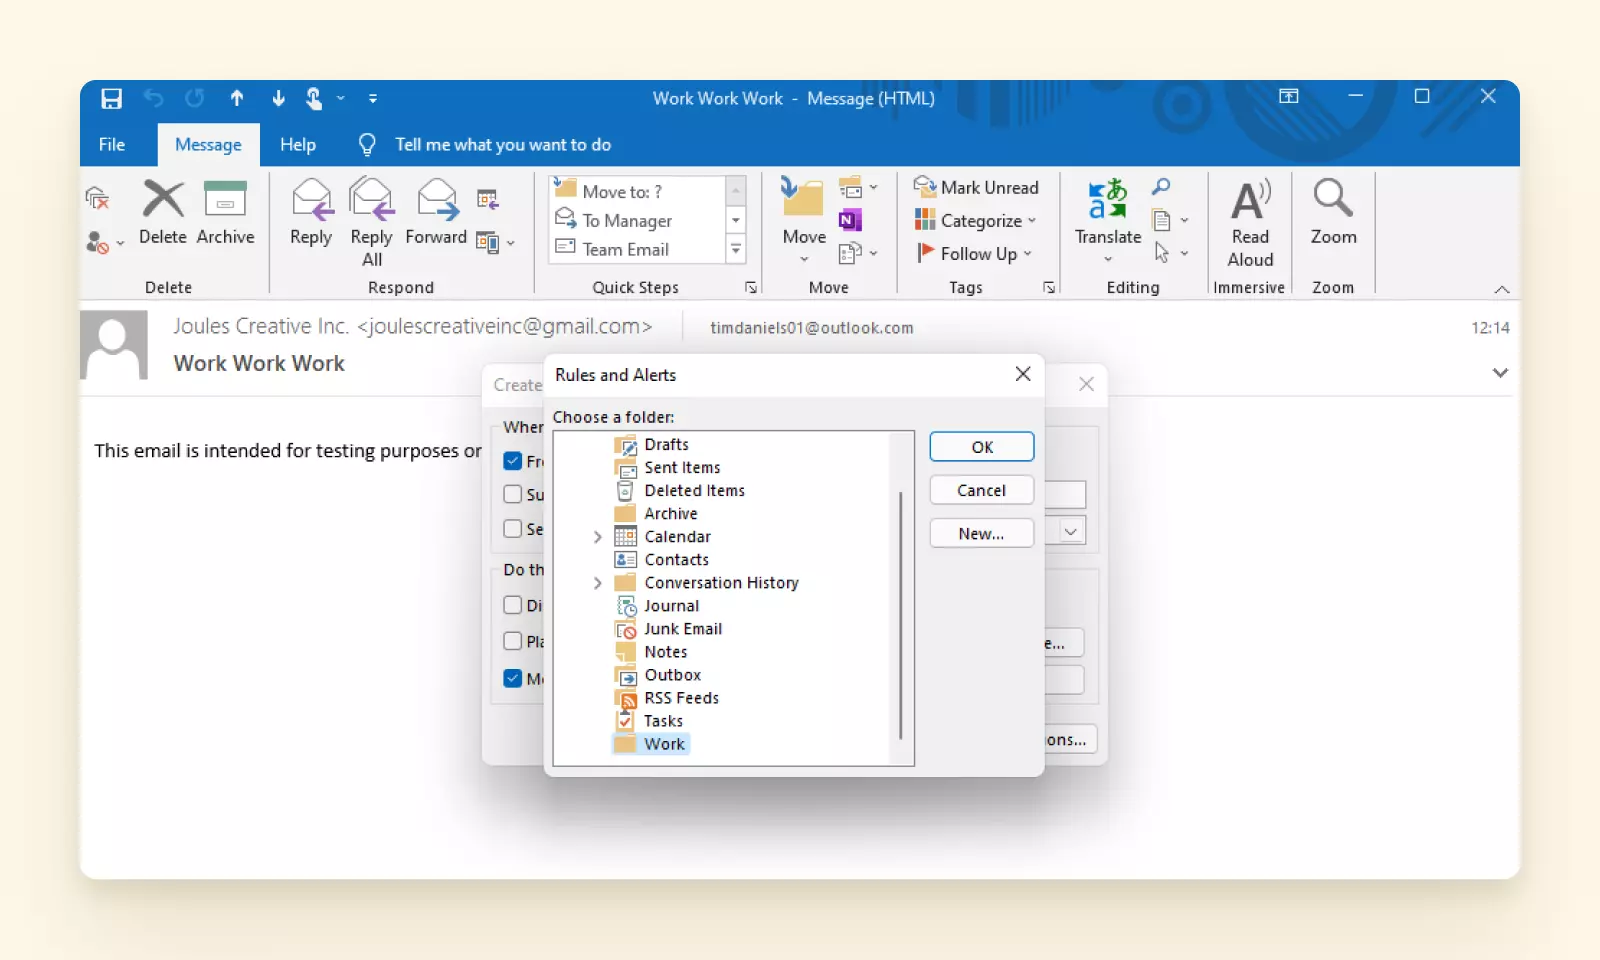
Tip: If you want, you may choose to create a new folder by clicking on New.
6. Finally, click on OK.
You have successfully chosen to receive emails from a specific sender in a separate folder.
Create a filter rule in older MS Outlook versions
If you use an older version of the MS Outlook email client, such as the 2007 or 2010 releases, the process is slightly different:
1. Right-click on an email from the sender whose emails you want to filter.
If you use Outlook 2010, click on Rules, then Create Rule. In Outlook 2007, you'd have to choose Create Rule and then click on the From [Sender] checkbox.
2. Next, click on the Move the item to folder checkbox.
3. Click on Select Folder.
4. Then, you'll need to choose the folder where you want those emails to go.
5. Finally, click on OK twice to complete the process.
Want Easier Search and Filtering Functionality?
On one hand, you have a webmail tool with quite straightforward functionality, but it only services Outlook and Hotmail accounts. On the other is a desktop email client that services addresses from any provider, but it has quite a cumbersome filter feature.
If you want powerful features that are easy to use, you may want to try Mailbird.
What Is Mailbird?
Mailbird is a desktop email client designed for Windows 7, 8, and 10 that can offer you the following:
- Easy email management. You can send and receive emails, manage your contacts and calendars, oversee tasks, and manipulate your email preferences across multiple email providers, all from the same place.
- Support for different email services. Mailbird supports most email providers, including Gmail, Yahoo Mail, and Outlook.
- Support for popular third-party apps. It features integrations with several social media platforms and team collaboration apps, including WhatsApp, Asana, Slack, and Google Chat for your video conferencing needs.
Undoubtedly, Mailbird is one of the best email clients out there, if not the very best. Let us examine what exactly gives this platform the advantage over other options.
Features of Mailbird
Here are some of the more exciting features that Mailbird offers its users:
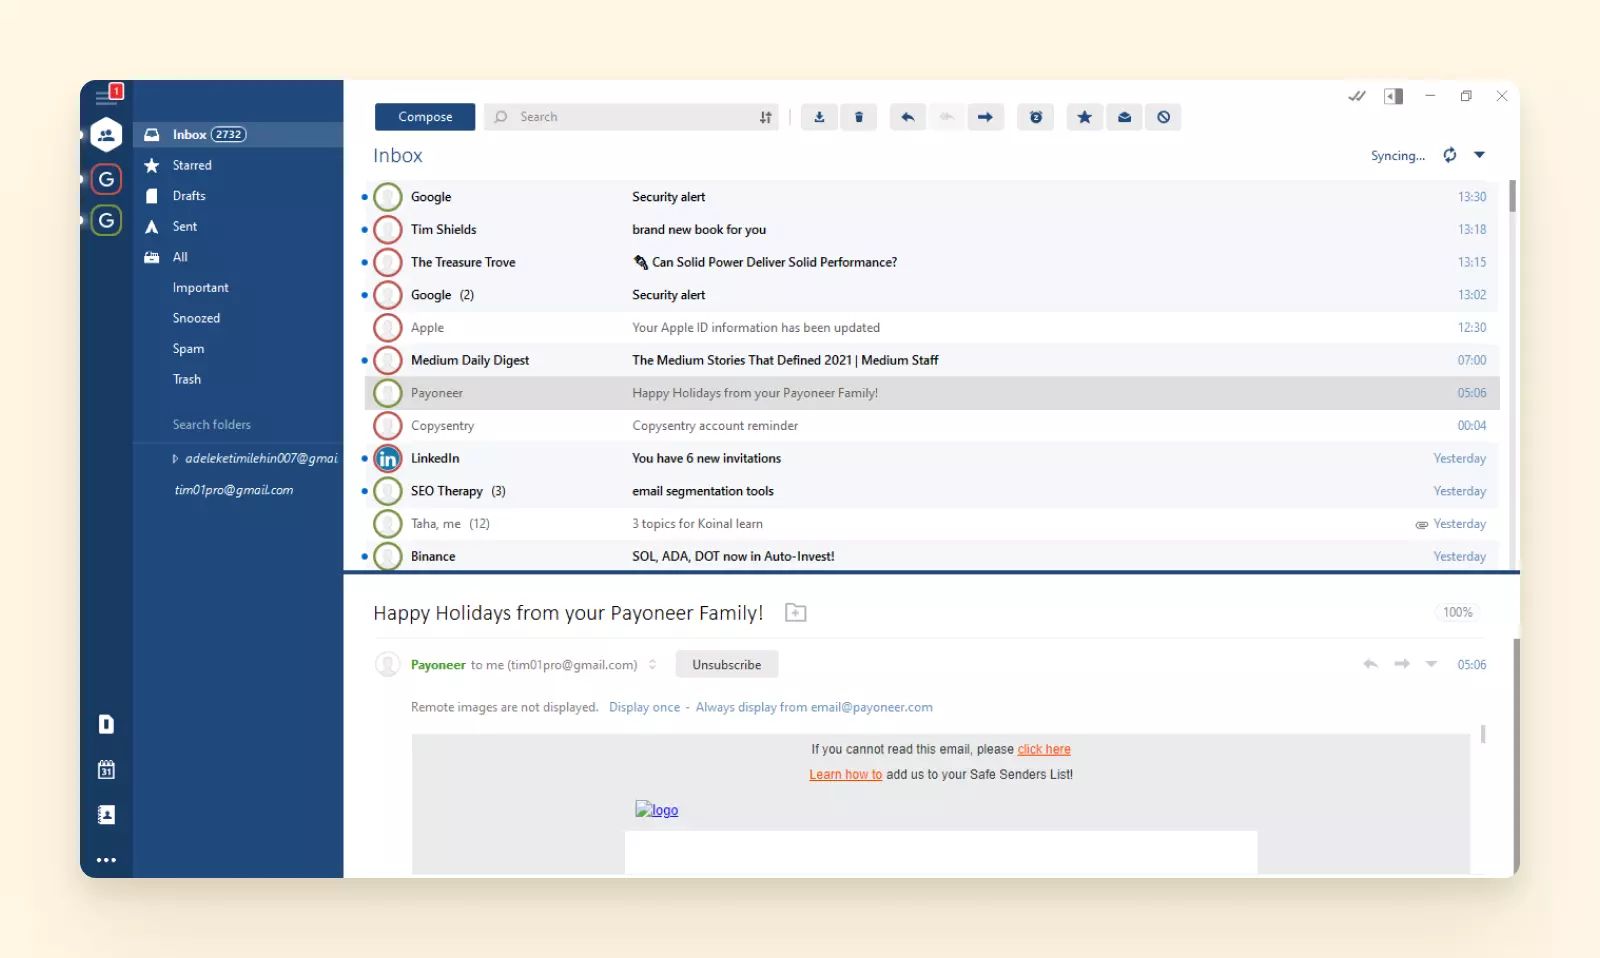
Unified inbox
You can manage all your contacts and the emails they send across multiple accounts from just one inbox. This makes keeping up with your emails super convenient and allows you to save so much more time than when you have to shuttle between various apps and websites to get to your emails.
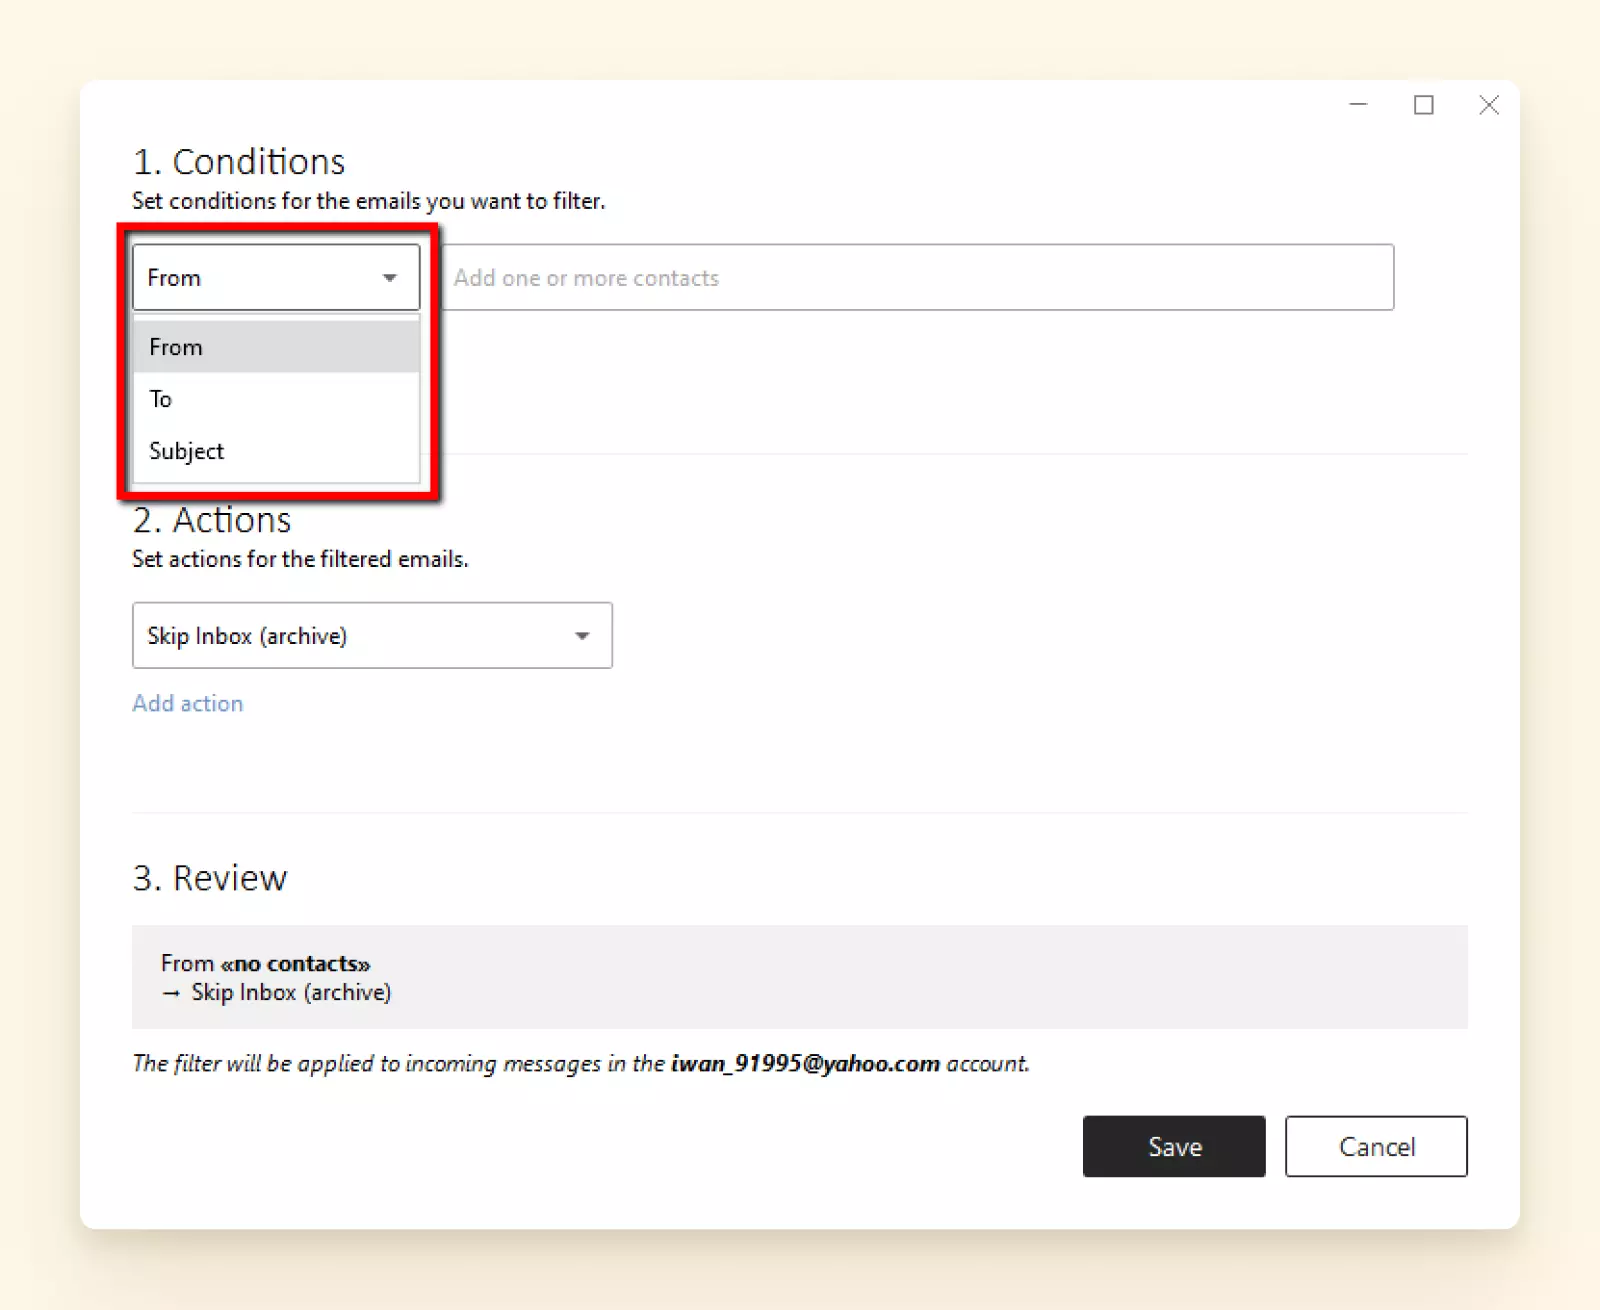
Filters and rules
Mailbird has an understandable interface for creating email filters and rules where you can specify filter conditions and add the actions that should follow. You can even choose to add filters across multiple email accounts at once!
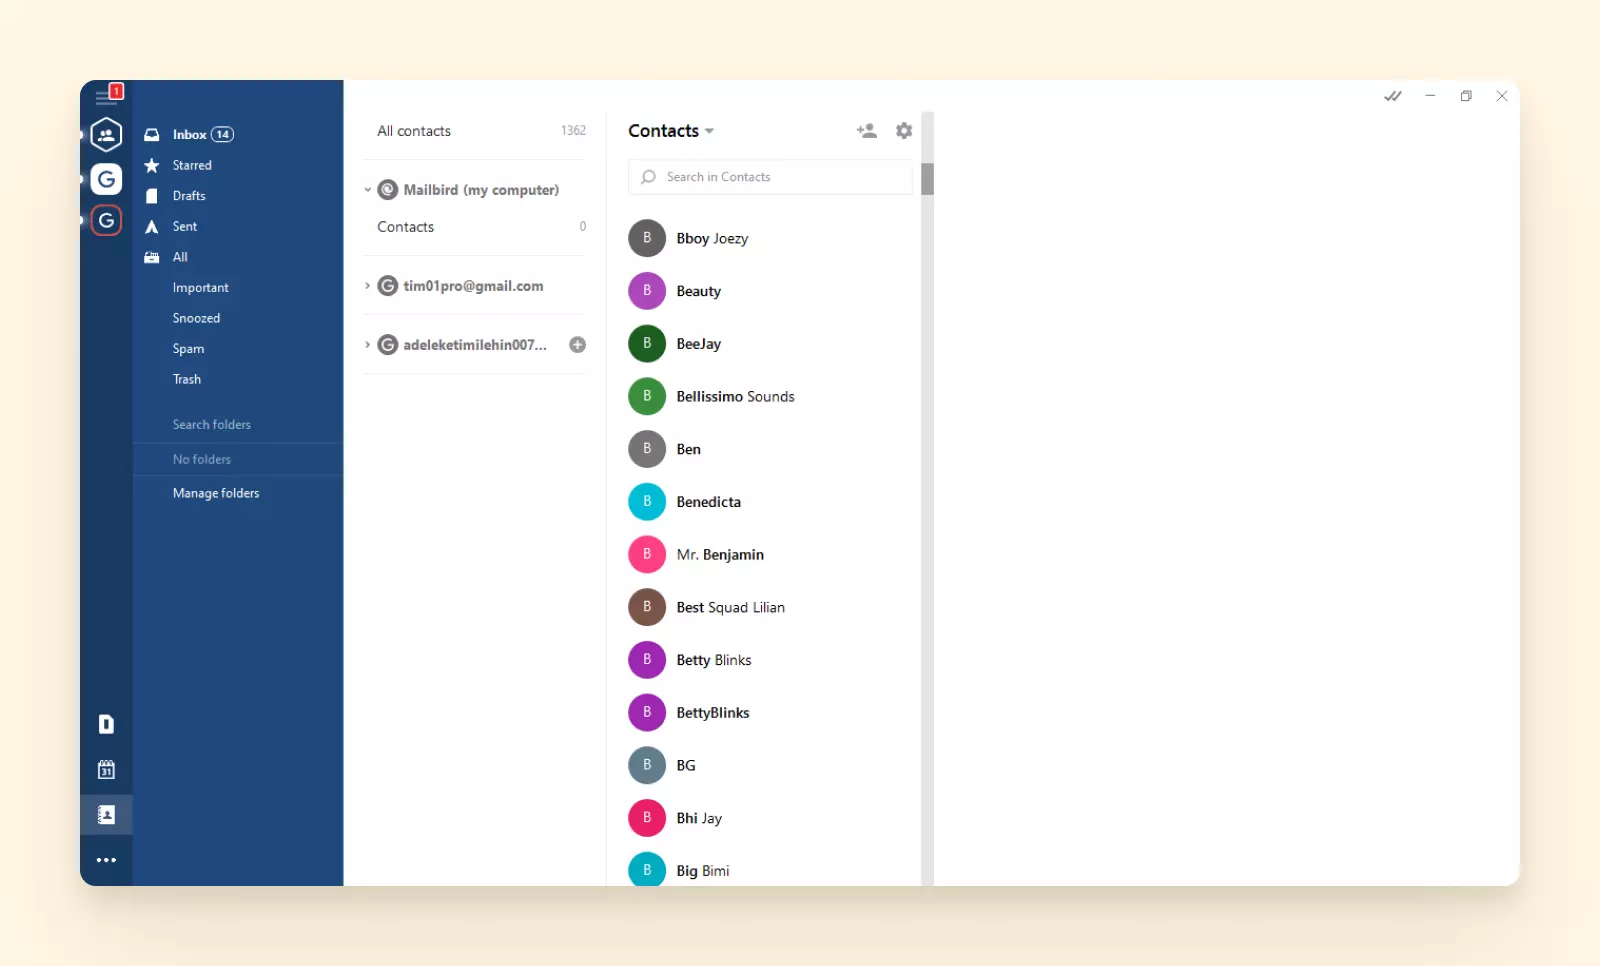
Contacts manager
Mailbird's contacts manager is top-notch, as it helps you unify and organize all your contacts so you can easily access them. Besides, the email client also has other functionalities, such as contact linking and merging, which helps improve your contact management efforts.
Productivity features
When it comes to improving productivity, Mailbird is unmatched. With features that help you save time and effort, better productivity is within your grasp when working with your emails.
Some of Mailbird's productivity features include:
- Email tracking. You can see if and when the recipient of your sent email has opened it.
- Snoozing email. You don't want to deal with an email yet? You can snooze it and let the notification come to the top after a specific duration.
- Attachment search. With this feature, you can search directly for attached files in emails and filter your search results by file size or thumbnail size.
- In-line reply. Mailbird also offers in-line replies to help you note which messages are yours. This way, there is less confusion, and you can stay on top of the conversation.
- Tagging. This feature allows you to quickly add a new recipient to a new or existing email conversation.
Multi-language support
Today, Mailbird features spell check support for eleven languages, aside from UK English, and the interface supports 26 languages overall.
24/7 support via email
Mailbird is committed to ensuring its customers get the best possible experience while using their email client. So, they offer 24-hour customer support via email to ensure you can always get help when you need it.
Conclusion
When you ask how to filter emails in Outlook, you'll get another question in return - which version are you using? There's Outlook on the web offered by Microsoft's email service, and there are also the numerous versions of the MS Outlook desktop email client. All versions have a slightly different algorithm for creating filters and rules.
We hope this article has helped you understand how to filter emails across the various Outlook platforms. But why stop there? You can leverage the different, advanced functionalities that the Mailbird email client offers — including more filtering flexibility.